At the core, our Passenger Web App (PWA) provides a way for your clients to book rides, manage their account, and track their in-progress rides with status updates and driver GPS location.
For instructions on using your PWA, please see our article for information on How-To Utilize the Passenger Web App (PWA)
Below you will find instructions to help you set up and customize your PWA in order to get it out to your customers to use.
SEO Properties
One advantage to the Passenger Web App (PWA) is that it supports Search Engine Optimization (SEO) properties. SEO helps search engines understand and present content.
We now give you the ability to add in some SEO properties to help you increase visibility of your PWA when people search for your products or services.
In order to add or edit your PWA’s SEO Properties:
- Click on the ‘My Office‘ icon.
- Click on the ‘Company Settings‘ tab.
- Click on the ‘Online Reservations‘ button.
- Click on the ‘PWA‘ button.
- Under the ‘Settings‘ tab, you will see a section ‘SEO Properties‘
Note: If applicable, make sure to select the Alias to add or edit the SEO Properties for each Alias. - Enter in the applicable SEO Properties
- Click ‘Save & Publish‘
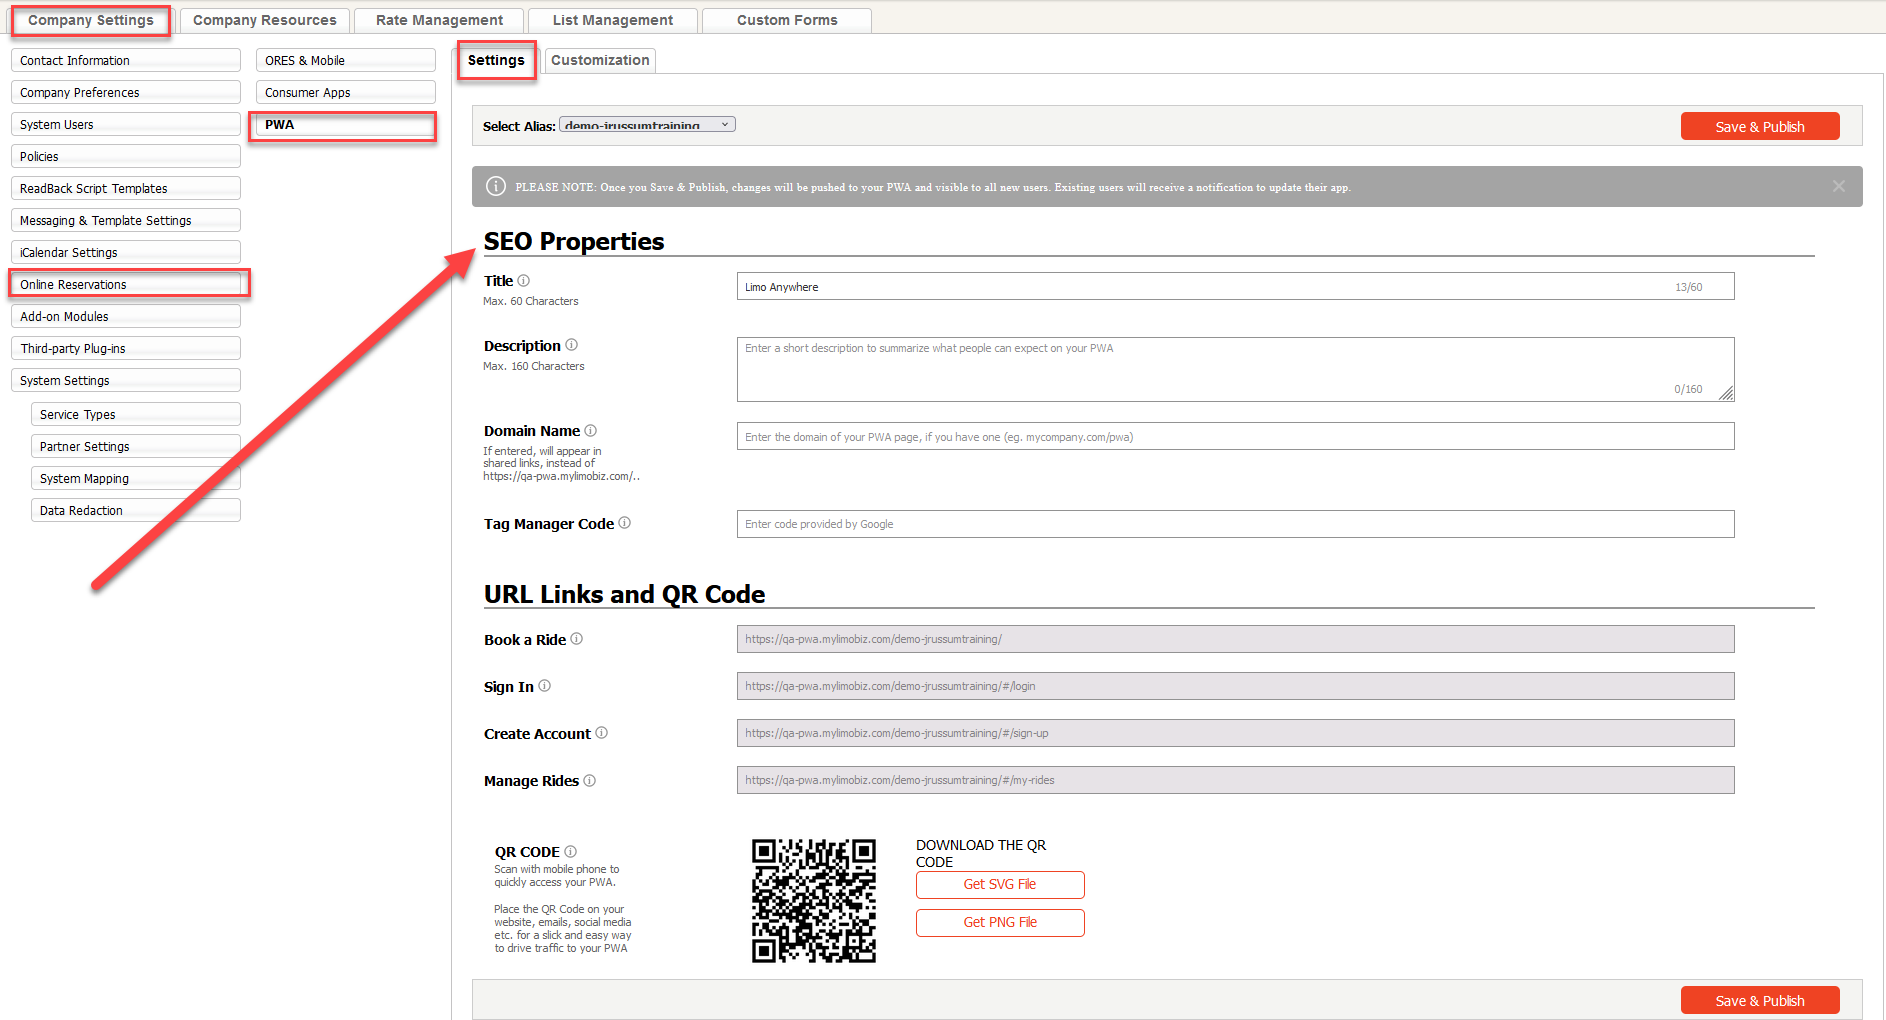
There are 4 fields under SEO Properties that you can fill out.
- Title: This is the title of your PWA that you want to display
- Description: A brief description of your PWA to direct people to your PWA
- Domain Name: This is the URL you want to display
- Tag Manager Code: Enter in Google Tag Manager (GTM) code provided by Google
NOTE: Limo Anywhere does not support or assist with SEO.
Link and QR Code to Your PWA
Our Passenger Web App (PWA) can be accessed from any mobile browser with internet connection.
You can find the links and QR Code to your PWA in Limo Anywhere.
- Click on the ‘My Office‘ icon.
- Click on the ‘Company Settings‘ tab.
- Click on the ‘Online Reservations‘ button.
- Click on the ‘PWA‘ button.
- Under the ‘Settings‘ tab, you will see a section ‘URL Links and QR Code‘.
Note: If applicable, make sure to select the Alias for the correct links and QR code that you are wanting to get. - Clicking on each provided URL will automatically copy it to your clipboard
- To download the QR Code, click ‘Get SVG File‘ and/or ‘Get PNG File‘ depending on the format you want
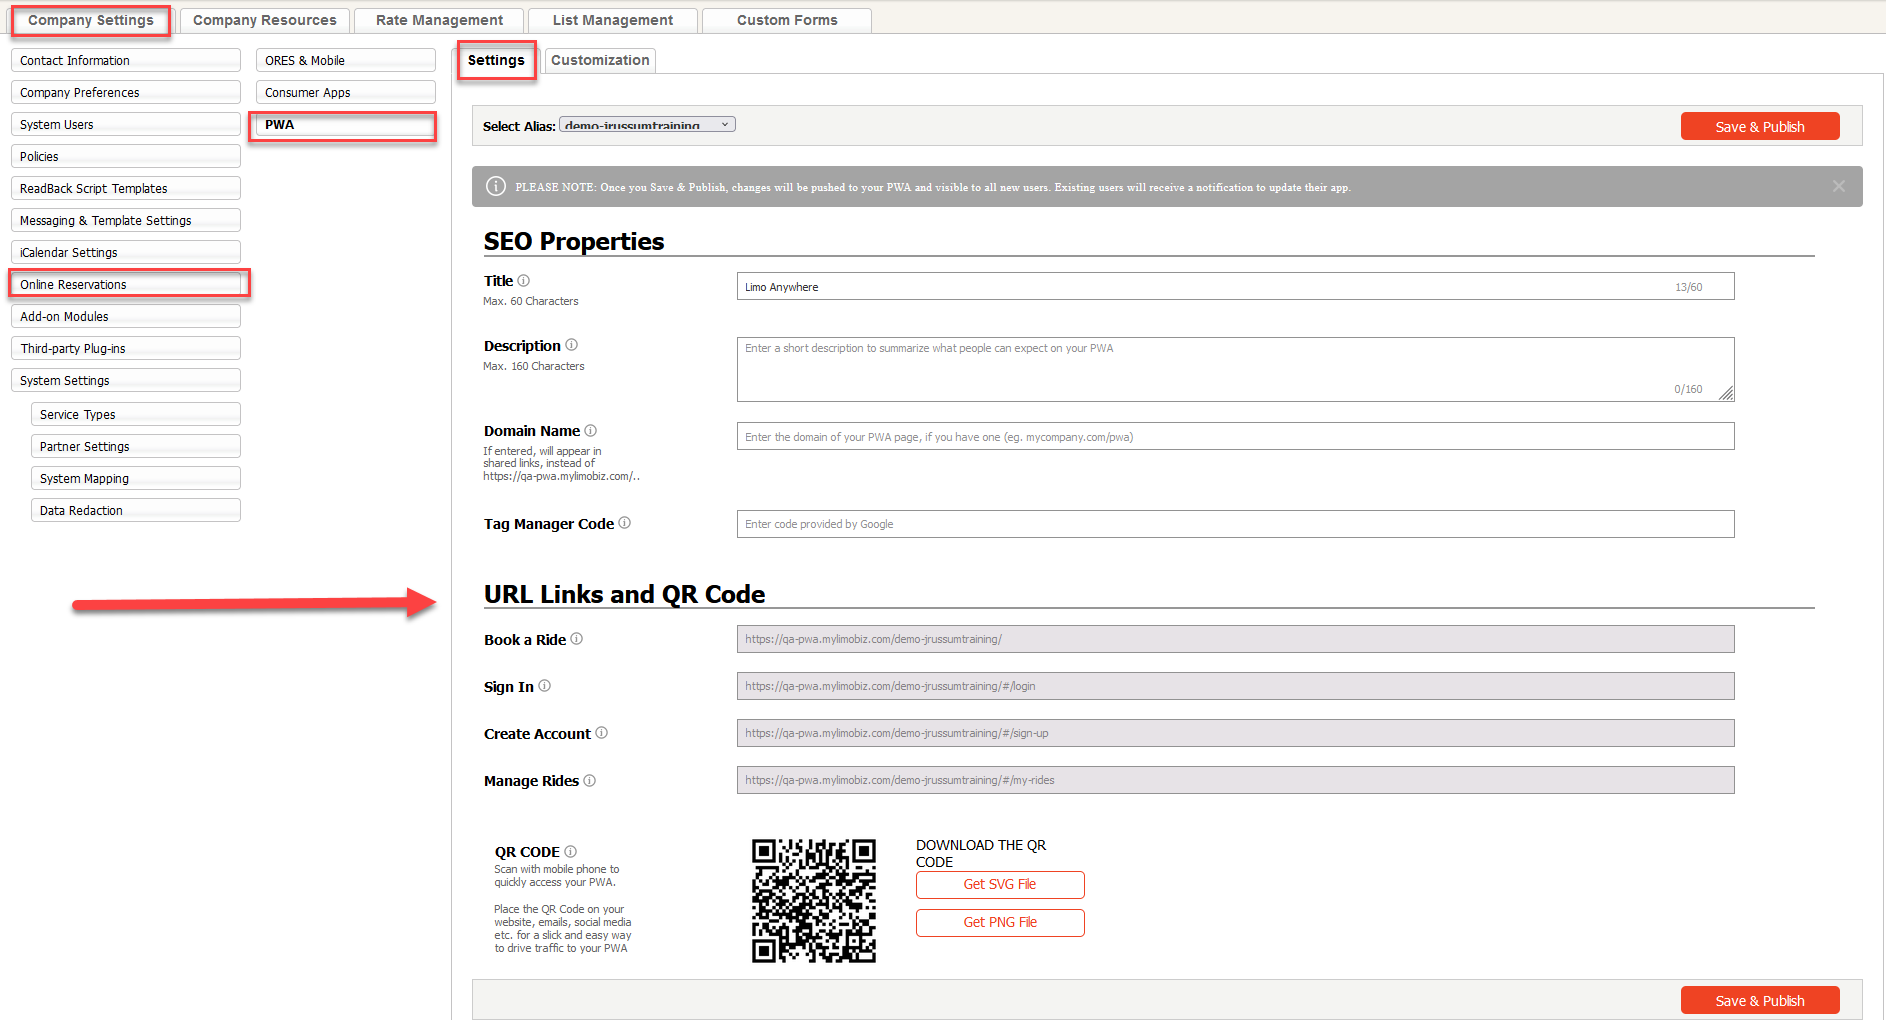
URL Links
We provide you with 4 different links that you can add to your website and/or client communications that will direct your clients to specific sections of your PWA.
- Book a Ride: This URL Link will direct your client to your PWA main page so they can book a ride.
- Sign In: This URL Link will direct your client to your PWA Sign In page so they can sign into their account.
- Create Account: This URL Link will direct your client to your PWA page to create an account.
- Manage Rides: This URL Link will direct your client to your PWA page for your client to see their Upcoming and Past Rides.
Note: Your client will need to be logged into their account to manage their rides.
QR Code
We provide you with the QR Code to your PWA main page that you can add to your website and/or client communications.
There are 2 downloadable formats we provide:
- SVG (Scalable Vector Graphics) format
This is a web-friendly vector file format. This format is ideal for logos and online graphics. SVGs can be significantly resized without losing their quality. Click the ‘Get SVG File‘ button to download the QR Code SVG file for your PWA. - PNG (Portable Network Graphics) format
This is a web-friendly image file format. This format is commonly used to a display higher quality image. Click the ‘Get PNG File‘ button to download the QR Code PNG file for your PWA.
Accessing Your PWA
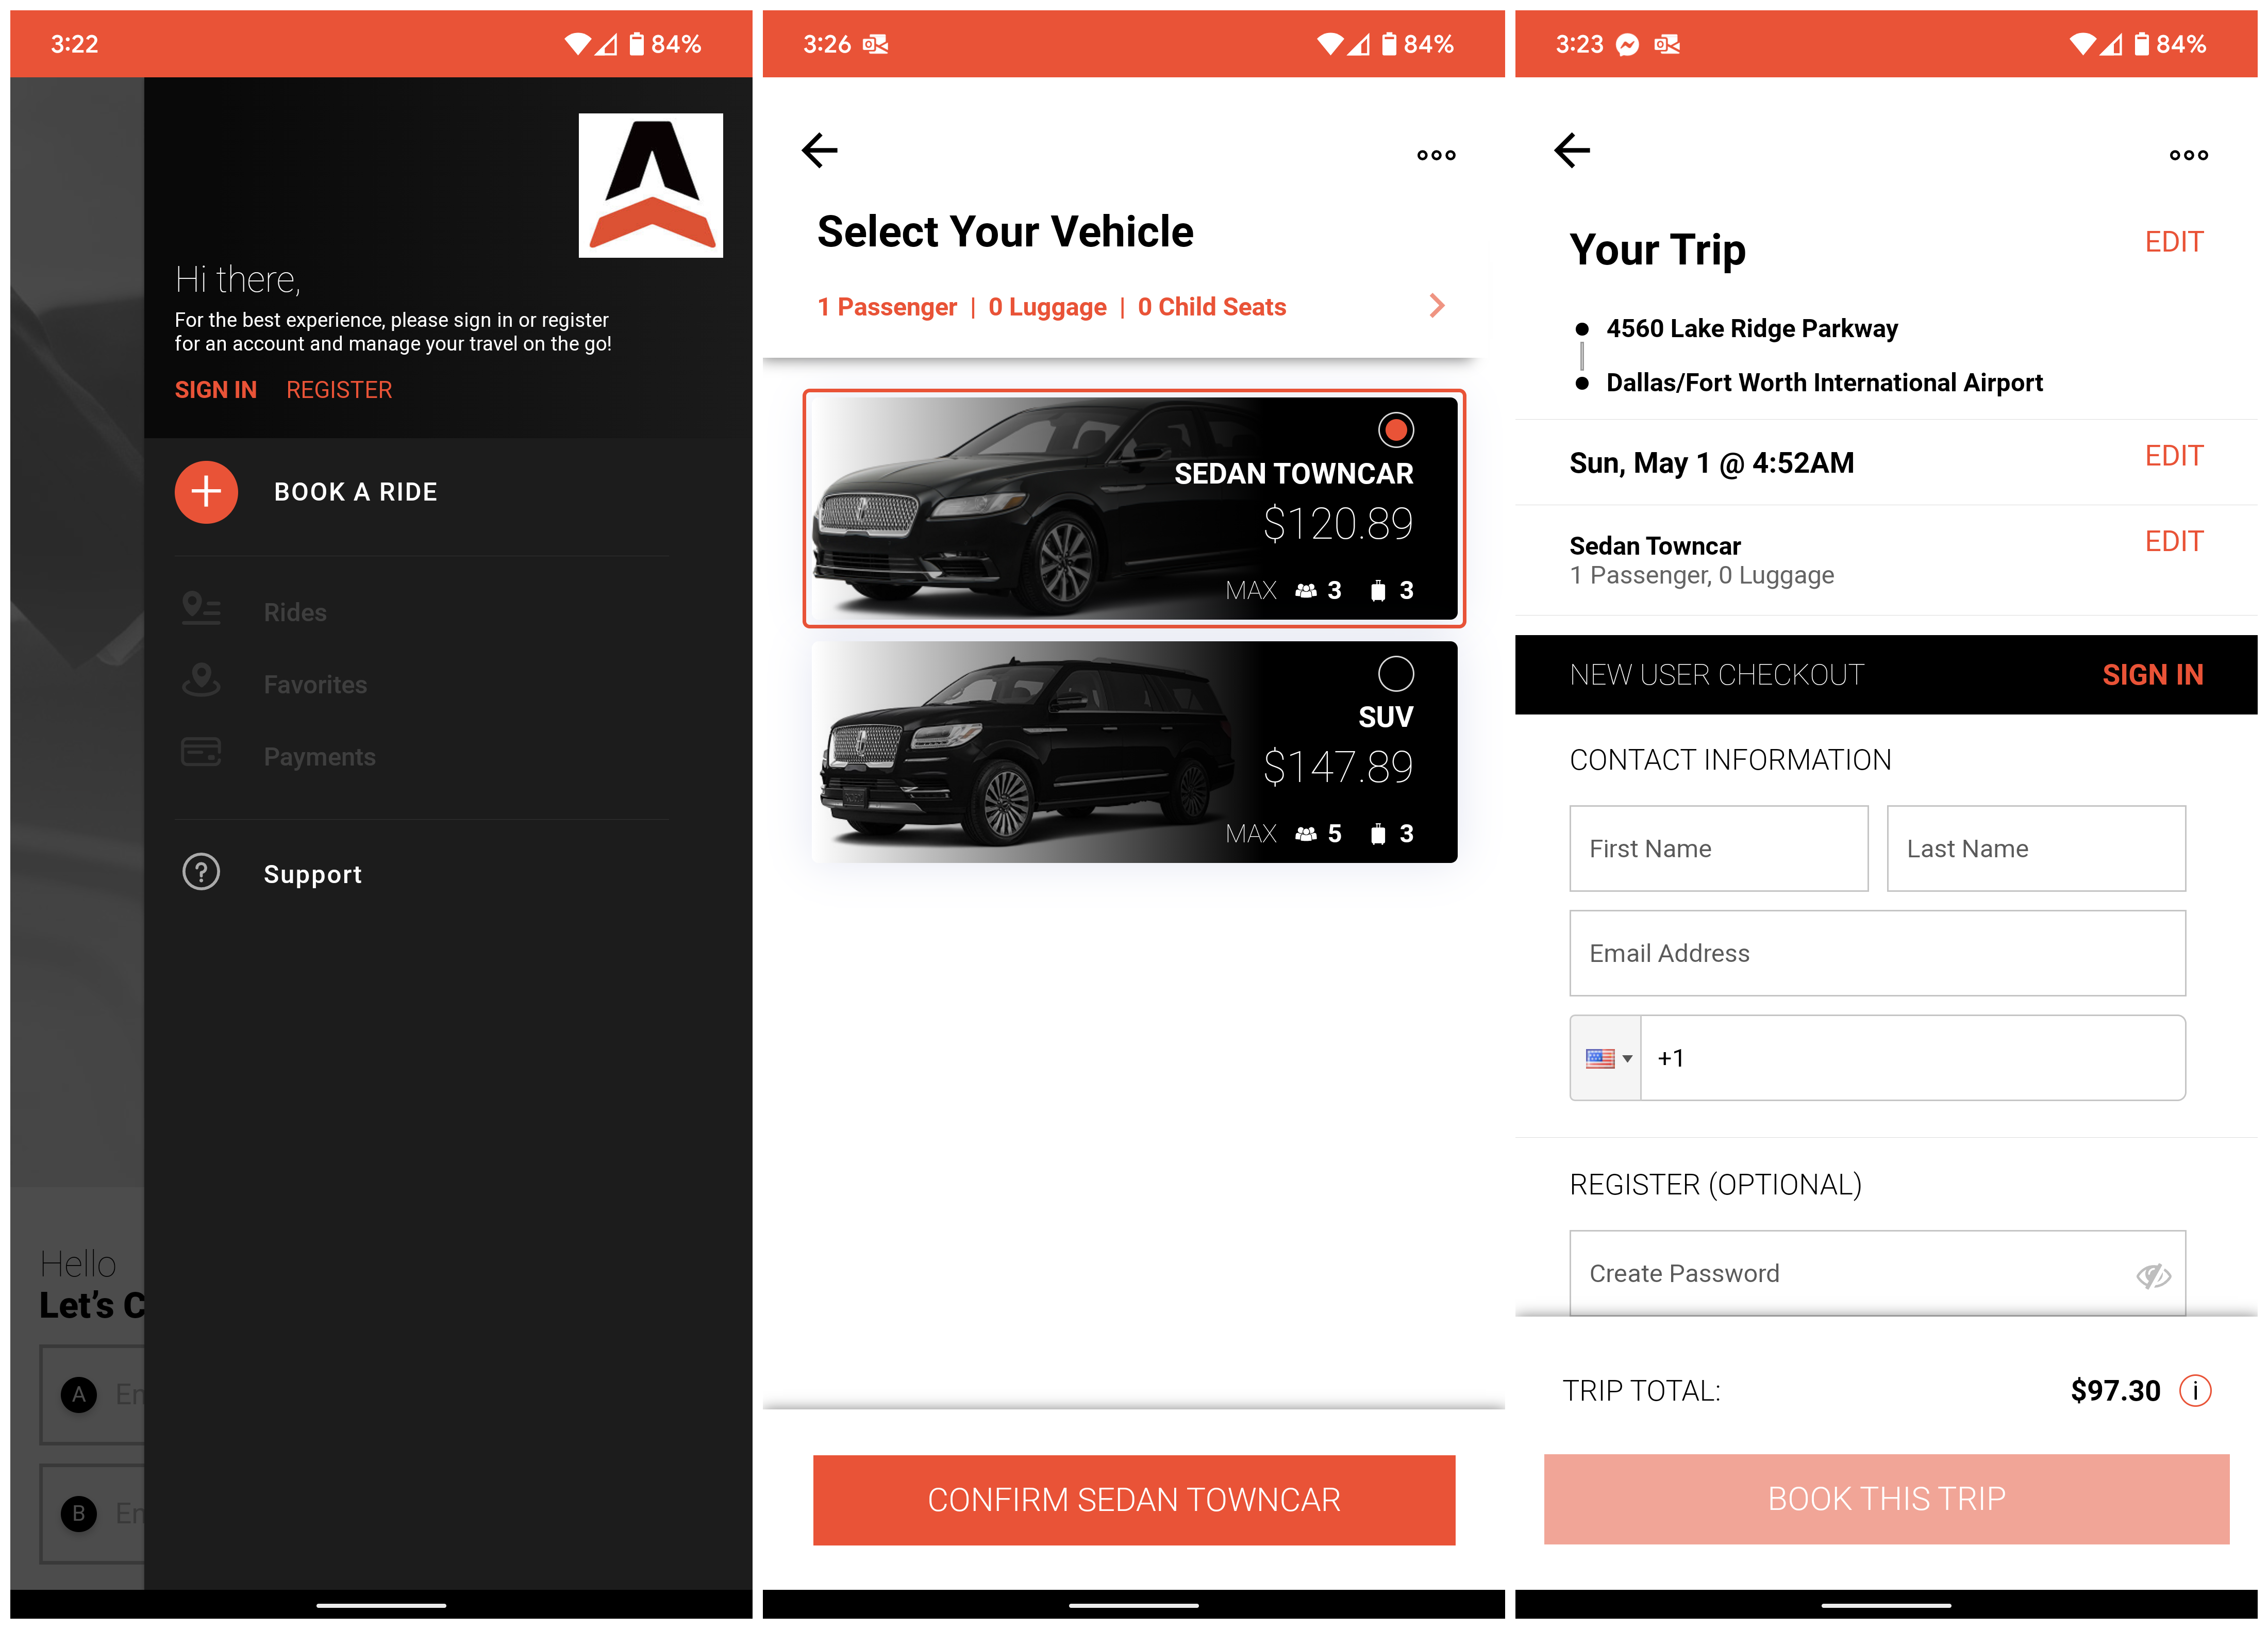
Your PWA can be accessed from any mobile device using the URL Links or QR Code above.
Mobile Browsers supported: Google Chrome, Mozilla Firefox, Opera, Safari, and Microsoft Edge.
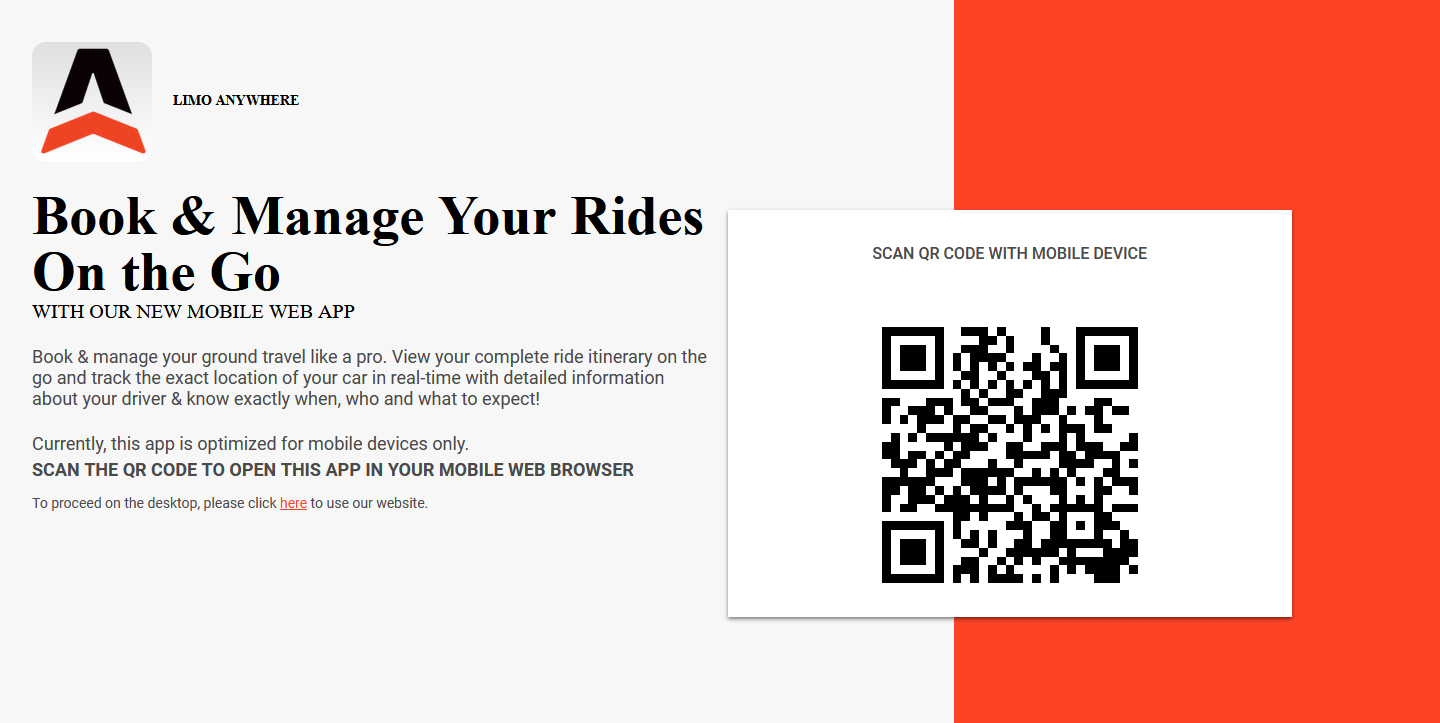
If accessed from a desktop/laptop, then the Landing Page will display a QR Code that your client can scan to open the PWA directly on their mobile device.
Customizing Your PWA
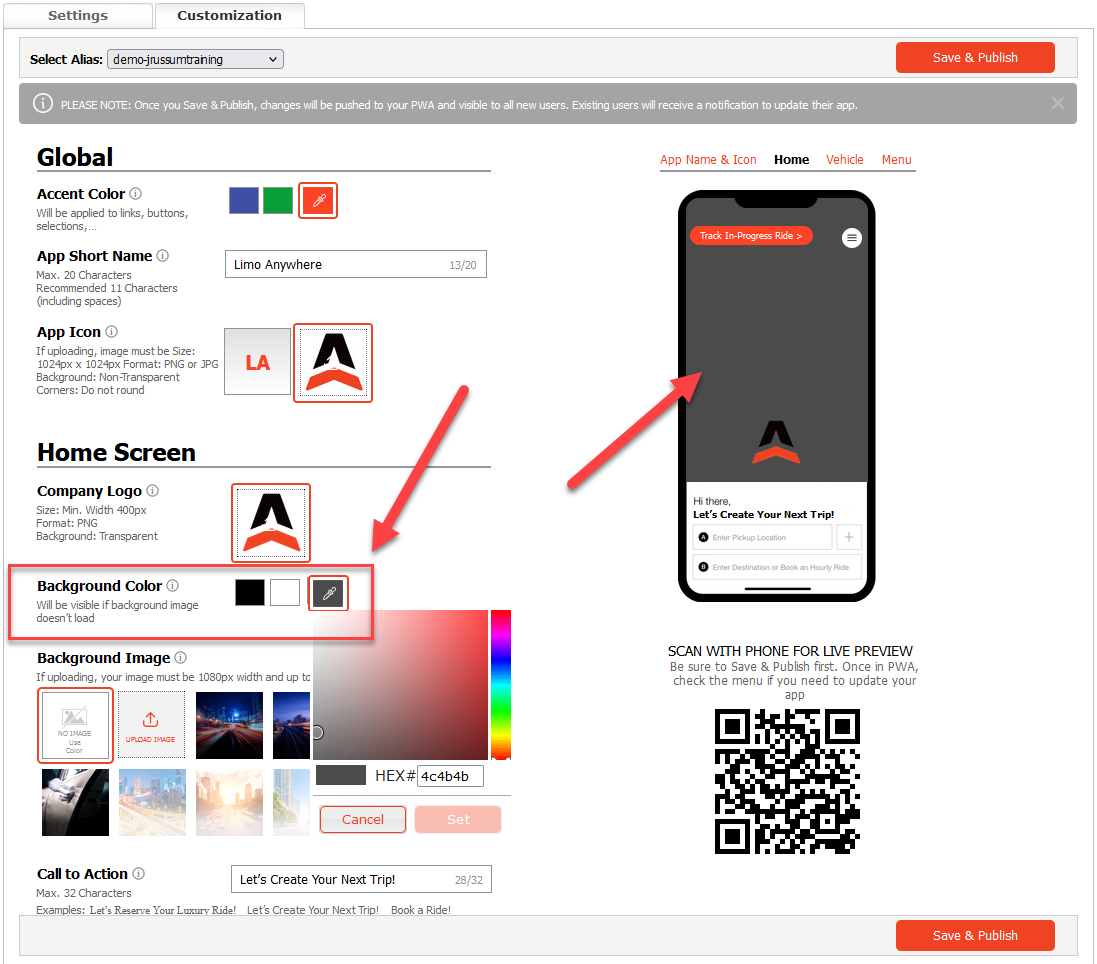
The Customization section lets you set and customize colors, texts, logo, and images for your PWA. We provide a preview on the right hand side of different screens of your PWA to allow you to see the customizations you are entering or selecting and how it updates the look and feel your PWA.
In order to customize your PWA:
- Click on the ‘My Office‘ icon.
- Click on the ‘Company Settings‘ tab.
- Click on the ‘Online Reservations‘ button.
- Click on the ‘PWA‘ button.
- Click on the ‘Customization‘ tab.
Note: If applicable, make sure to select the Alias to customize the PWA for each Alias. - Choose and Enter in the applicable Customizations you want for your PWA
- Click ‘Save & Publish‘ to save your changes
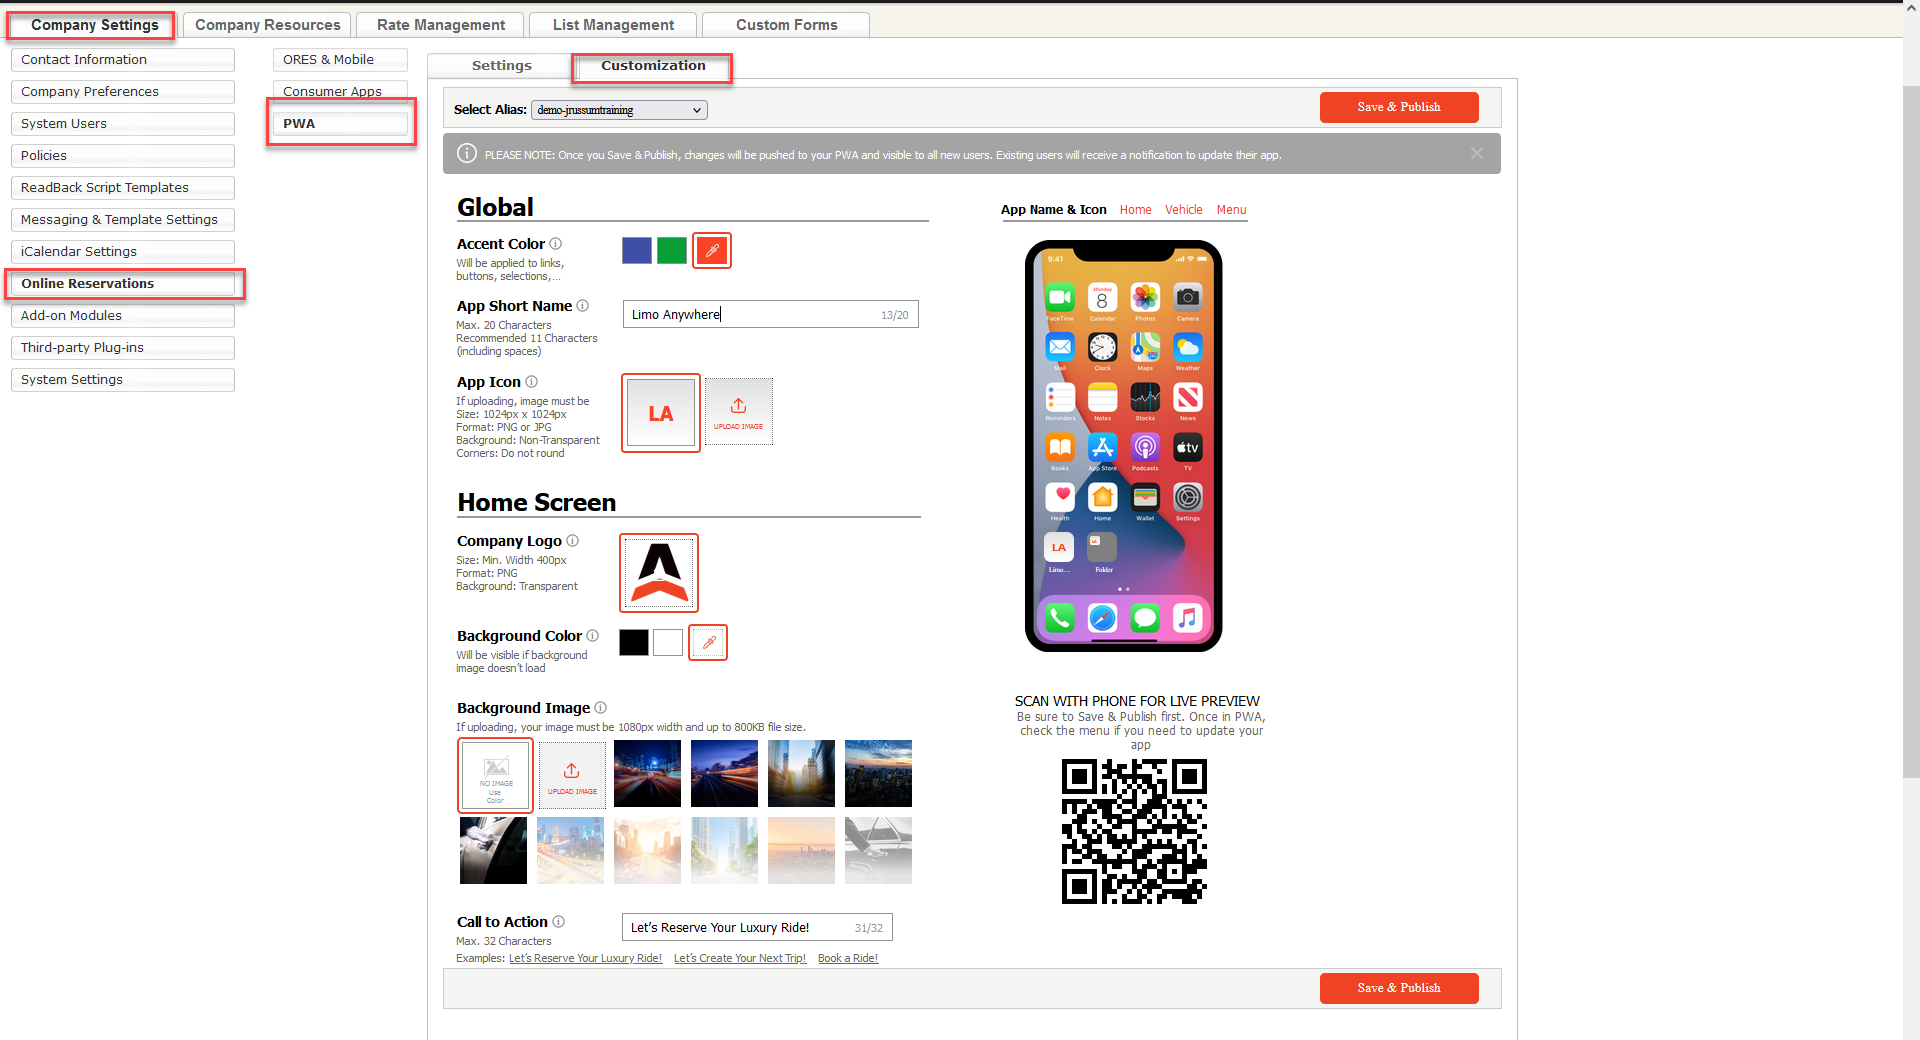
Accent Color
The Accent Color that you choose will be applied to links, buttons, and selections in your PWA.
We provide a blue and a green Accent Color selection or you can click on the eyedropper to choose or enter in the HEX code of your color.

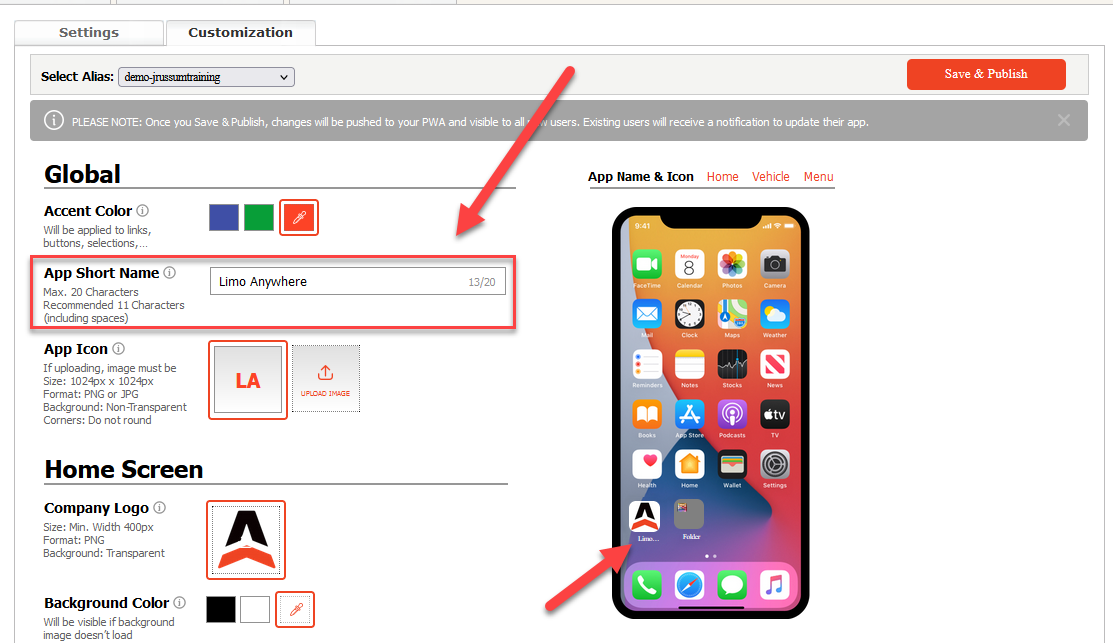
App Short Name
The App Short Name is the name of the PWA that will appear on the mobile device if installed.
The App Short Name is a maximum of 20 alphanumeric characters (including spaces). We recommend up to 11 alphanumeric characters.
App Icon
The App Icon is the icon that will be displayed on the mobile device for the PWA if installed.
We provide a basic text icon based off of your App Short Name or you can upload an image.
If you are uploading an image for the App Icon it must be:
- Size: 1024px x 1024px exactly
- Format: PNG or JPG
- Background: Non-Transparent
- Corners: Do not round (Keep square)
![]()
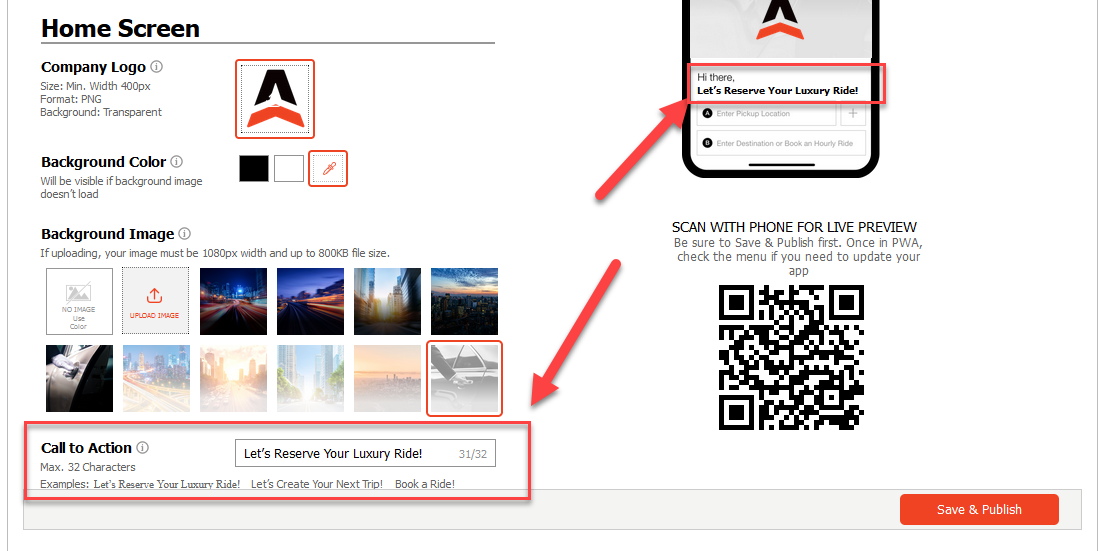
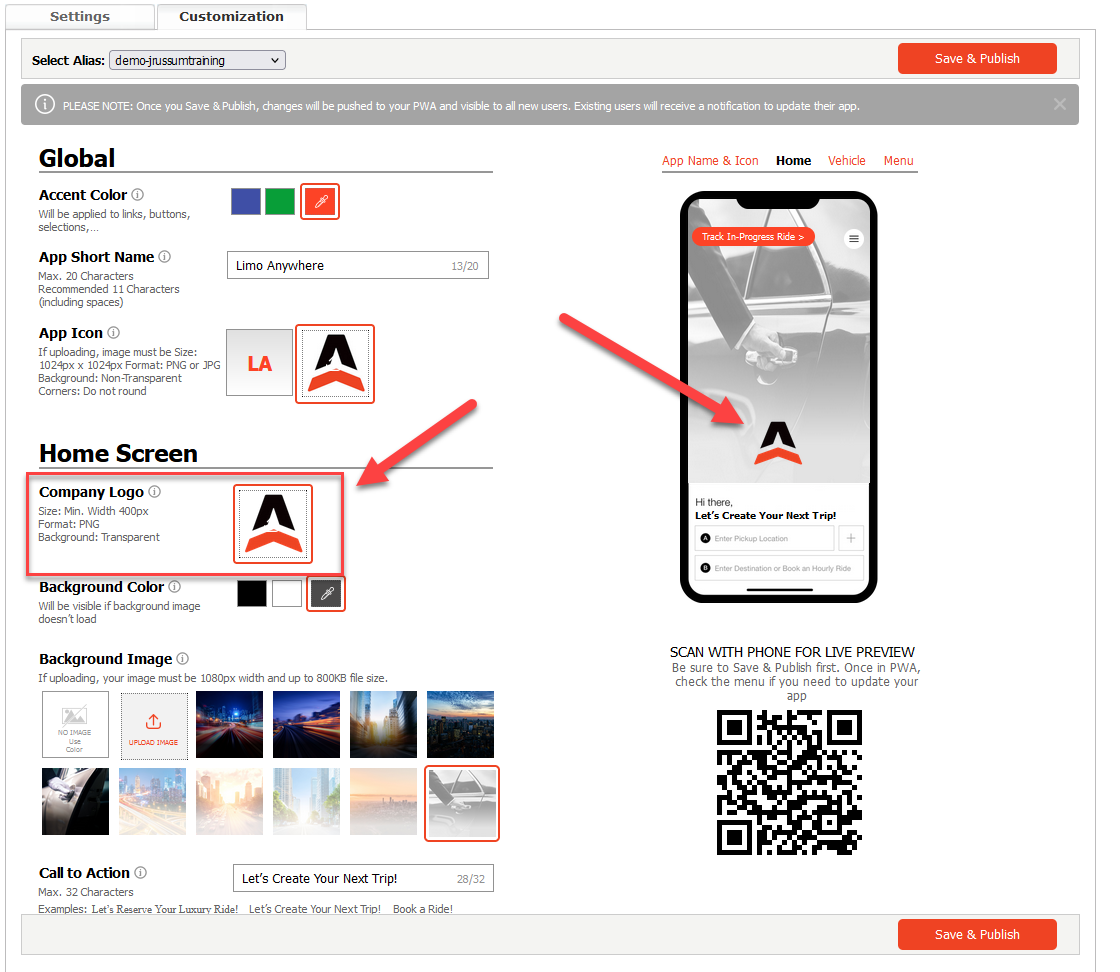
Company Logo
The Company Logo is what will show on your PWA’s Home screen.
If you are uploading an image as your Company logo it must be:
- Size: Min. Width of 400px
- Format: PNG
- Background: Transparent
Background Color
The Background Color that you choose will be applied behind your Company Logo on your PWA’s Home screen. If you do not use a Background Image or if your Background Image does not load then the Background Color will be shown.
We provide a black and a white Background Color selection or you can click on the eyedropper to choose or enter in the HEX code of your color.
Background Image
The Background Image is what will display on your PWA behind your Company Logo. We provide you with 10 images you can select to use as your background. You can upload your own image by clicking ‘Upload Image’ or you can choose ‘No Image’ to use the Background Color.
If you are uploading an image as your Background Image it must be:
- Size: Min. Width of 1080px
- Format: PNG or JPG

Call to Action
The Call to Action appears over the location selections on the Home Page. This is used to catch your users’ eye and persuade them to start booking. We provide you with 3 examples that you can select and use as your Call To Action or you can create your own (Max. 32 characters).
