This guide explains how to set up and use the Contract & Credit Card Capture feature in Limo Anywhere. The feature is optimized for use with LA PAY. If you use another payment processor, you’ll need to enter credit card information manually.
Setting Up Waiver Configurations
It is recommended to create two different waiver configurations:
- Default Configuration: Collects basic information.
- Secure Configuration: Collects additional information for high-risk transactions, such as a photo ID or a photo of the credit card.
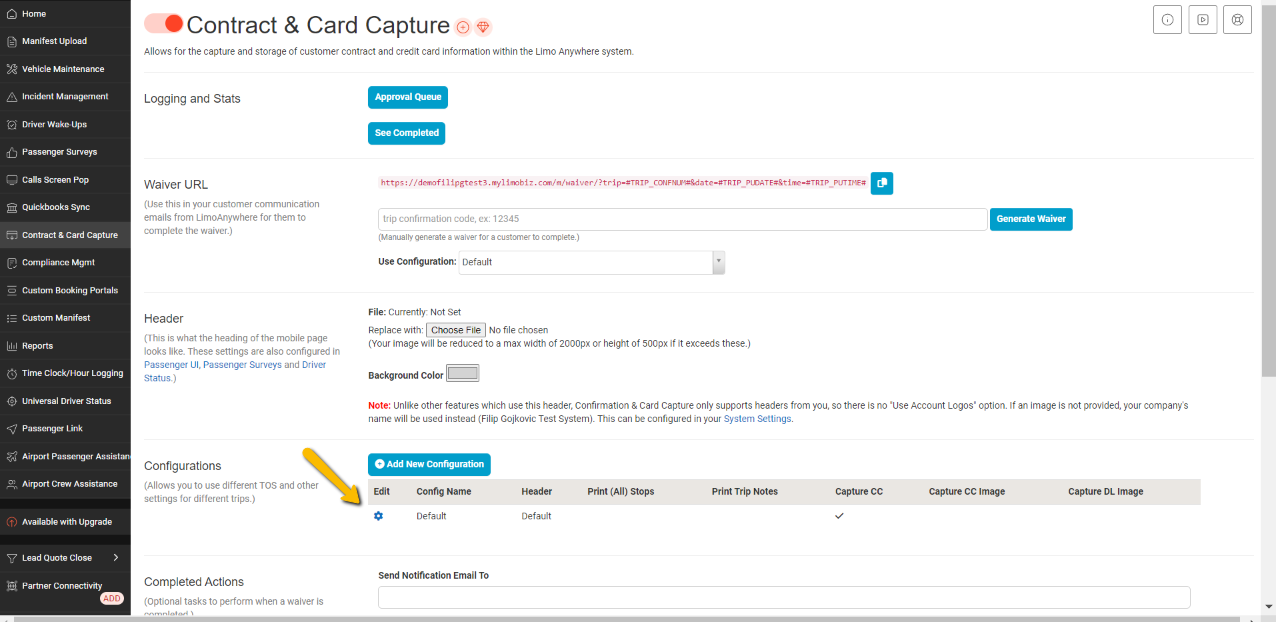
To set up the Default Configuration:
- Click the Gear icon next to the Default config.

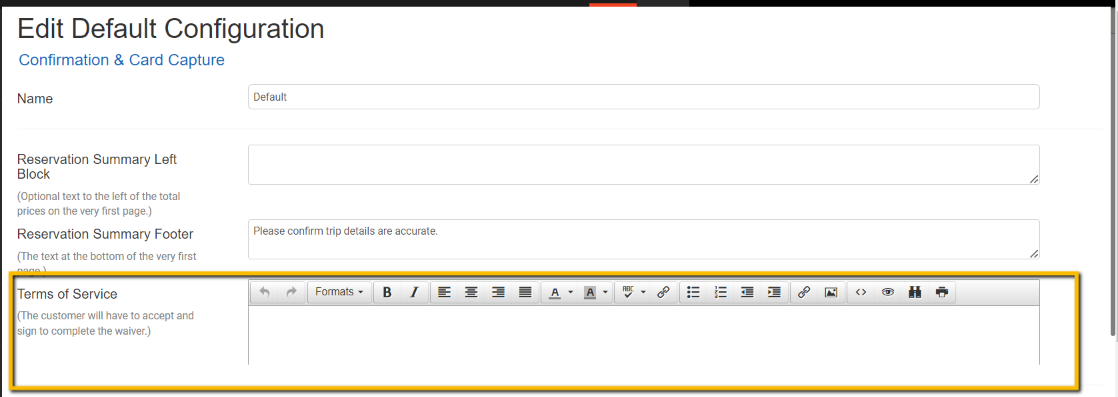
- Enter your Terms of Service.


- Select the items you want to include in the waiver. Note: Some options are only available for the Lead Quote Close system.

- Under Capture, select these three options if you are not using Lead Quote Close:

To set up the Secure Configuration:
- Click “Add New Configuration.”

- Follow steps 1-3 from the Default Configuration setup.
- Select one or both of the following options:


- Save that configuration.
Confirmation & Card Capture Settings
- In the Confirmation & Card Capture screen, scroll down to the Completed Actions section.
- Enter an email address to receive notifications when a waiver is signed.
- Select the status you want the trip to enter when a customer completes the contract. It’s recommended to create a new status, such as “Contract Signed.” kb.limoanywhere.com https://kb.limoanywhere.com/docs/How-to-Customize-and-Manage-Trip-Statuses/#AddStatus
- Save the settings.
Setting Up Emails for Credit Card Collection
You can send emails to collect credit card information either manually or automatically.
Manual Email Setup
-
- Go to My Office > Custom Forms and create a new template.
- Add a subject line, such as “Signature and Payment Details Necessary to Complete Your Reservation.”
- You can create your own template or use a pre-configured HTML template from this URL: https://onboarding.limoanywhere.com/ccc-waiver. You can find the CCC Waiver URL at the top of the Confirmation & Card Capture page in the Add-ons section. Select the configuration you want from the Use Configuration section and copy the link.

- Change the input type from Normal to HTML.

- Paste the HTML code from the template.
- Select the custom form type (e.g., Billing or Booking contact).
- Make it available in ORES.
- Save.
Automated Email Setup


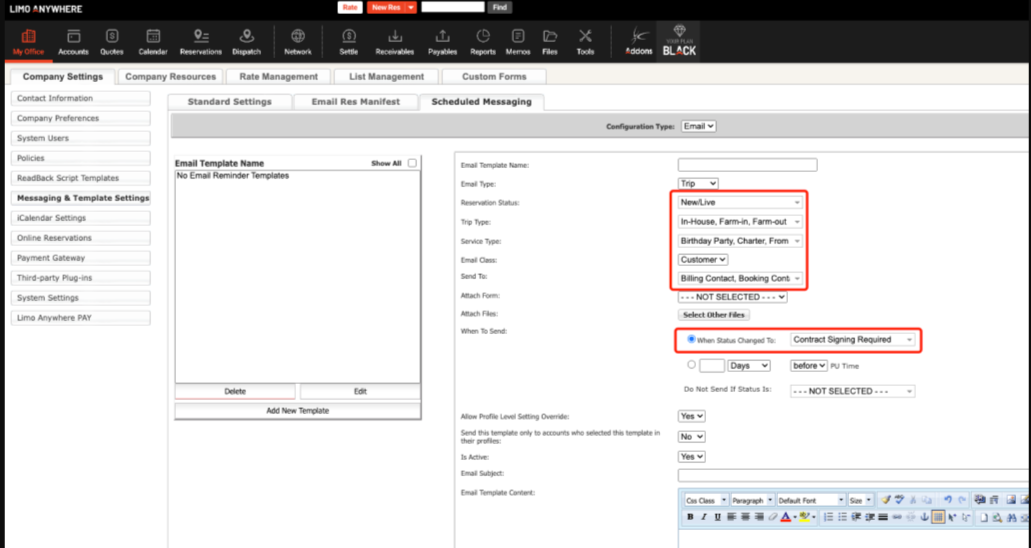
- Go to My Office > Company Settings > Messaging & Template Settings > Scheduled Messaging.
- Fill out the necessary sections (Reservation Status, Trip Type, Service Type, Email Class, and Send To).
- Under “When to Send,” select the new status you created for automatically sending the email.
- Follow steps 2-8 from the Manual Email Setup section to complete the setup.
To send an automated SMS message with the link to the contract, choose SMS from the Configuration Type.

Managing Approvals
- In the Confirmation & Card Capture menu, you can view the approval queue and see completed waivers.

- The approval queue shows waivers that haven’t been approved yet.
- The completed section shows all past waivers.
- To review a waiver in the approval queue, click the gear icon next to it.
Anything in the Approval Queue has not been approved yet and needs to be reviewed. The see completed section will show all of your past waivers.
Until a reservation is approved, the credit card numbers are visible. This is necessary if you aren’t using LA Pay and need to enter the information manually into a different payment processor. To obtain the CVV number, email support@limoanywhere.com
