Generating a Sales Revenue Report
Sales Revenue Report is one of the most important reports, which has the widest spectrum of specific information that can be generated in a single report.
This article will show you how to use the Sales Revenue Report to your liking with the information provided.
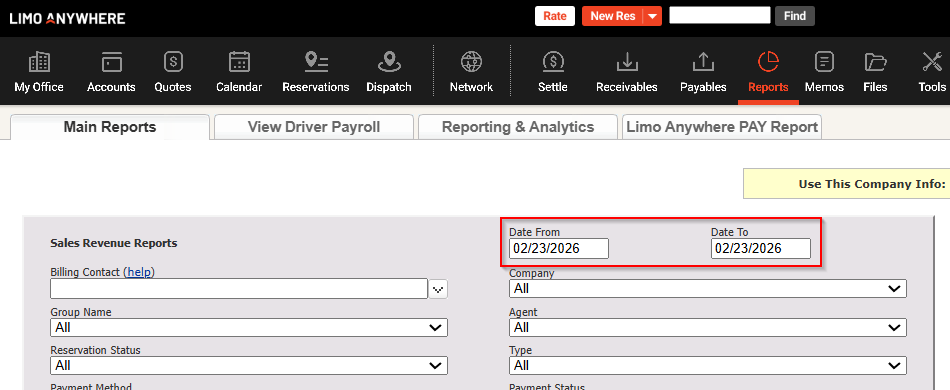
Step 1. Selecting Date Range
Click on Date From and Date To options, as shown on the screenshot below, and select the Date Range of your choosing. Date Range refers to the Pick-Up Date, not the Date when the reservation has been created.
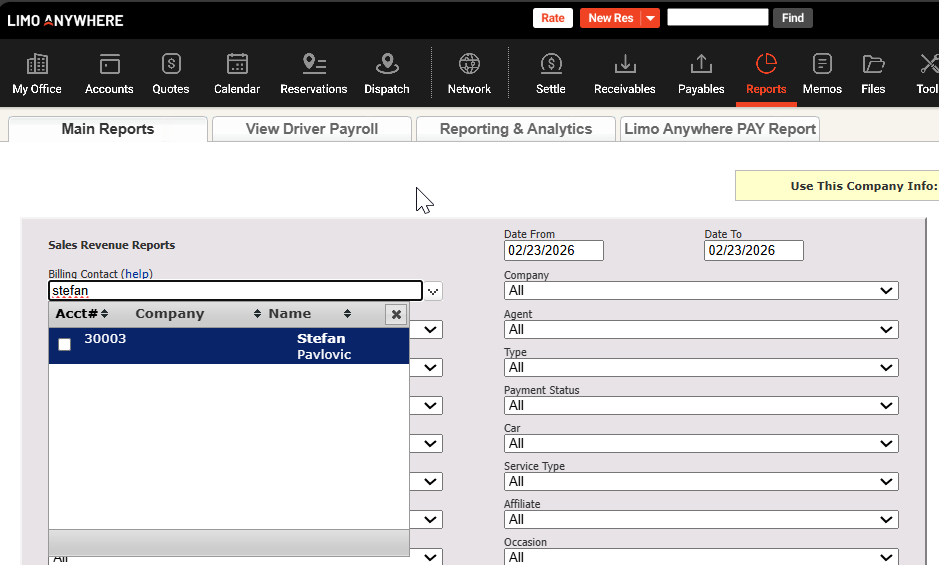
Step 2. Selecting Billing Contact(s)
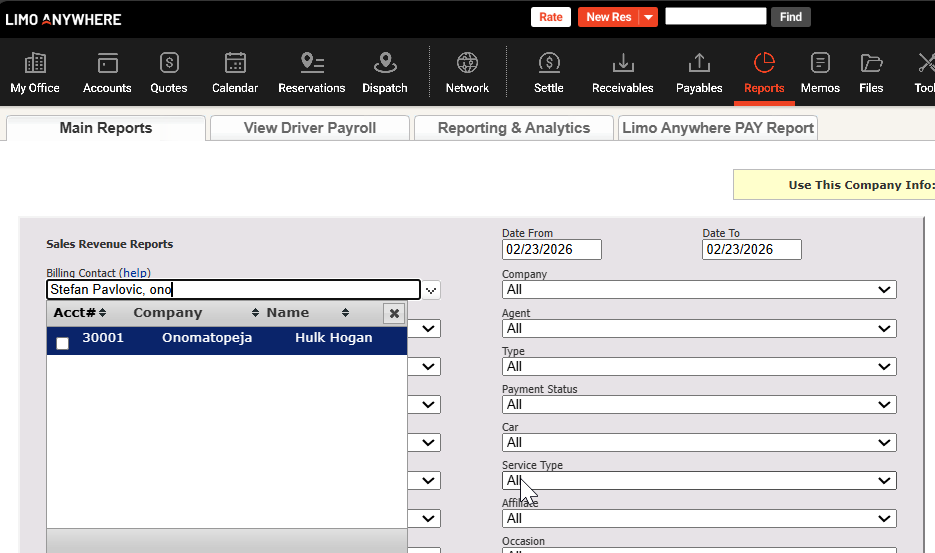
Click on the Billing Contact drop down field, which will allow you to type in the Name of the client, Company name or Account #, which will search your existing Accounts and find the desired client. You are also able to select multiple accounts which do not have to be connected with a Company name.
Selecting the first Billing Contact:
Selecting the additional Billing Contact:
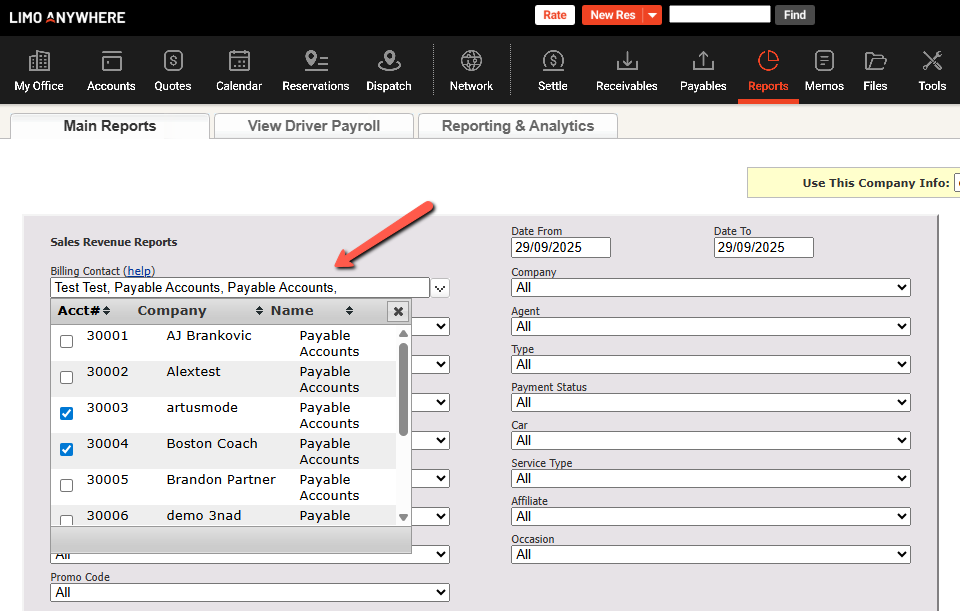
Selecting the Billing Contact is optional, it is not required to generate a report; if you wish to generate a report with all the reservations in the system, in the desired Date Range, leave the Billing Contact field empty.
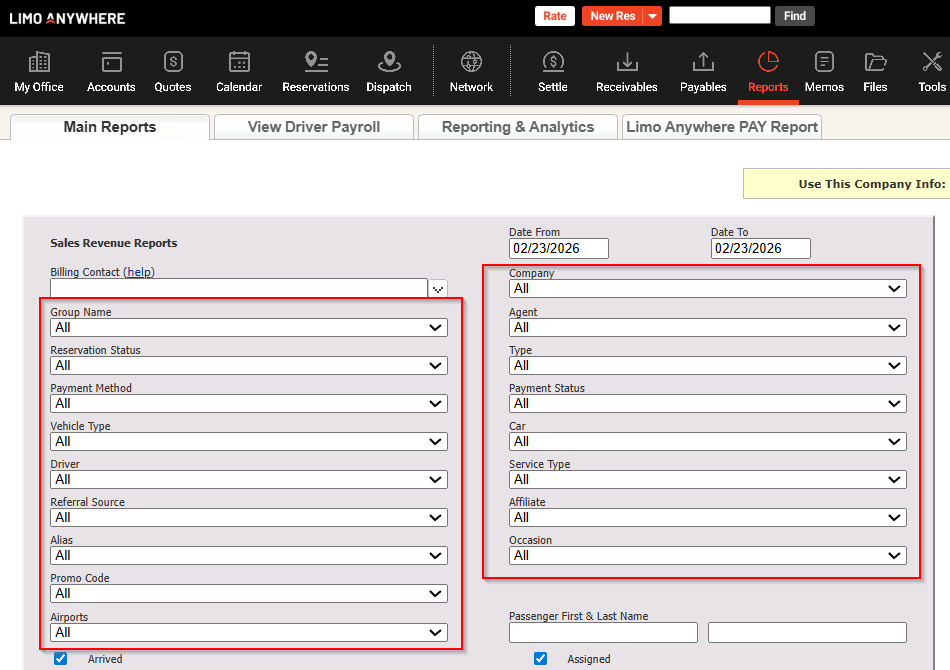
Step 3. Selecting Additional miscellaneous Information
After selecting the Date Range and/or the Billing Contact, the rest of the information if set as default, will produce a report with all of the reservations in the selected Date Range and/or all of the reservations for the selected Billing Contact(s).
Selection consists of:
- Company, Group Name, Agent, Reservation Status, Type, Payment Method, Payment Status, Vehicle Type, Car, Driver, Service Type, Referral Source, Affiliate, Alias, Occasion, Promo Code, Airports
- Statuses
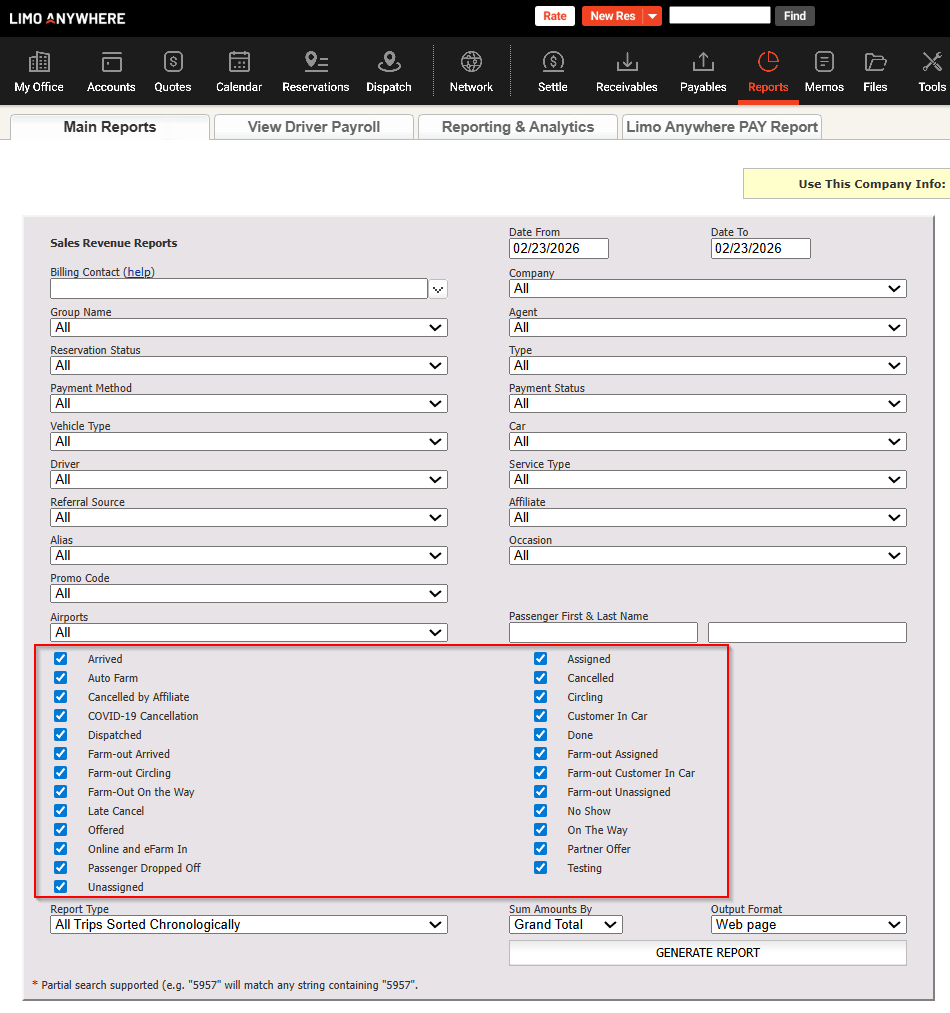 If you select a specific status(es), in order for the reservation to be shown in the report, that reservation will have to, at the moment of the creation of the report, be on the selected status(es).
Checked status(es) will be included, unchecked will be excluded.
- Passenger First and Last Name
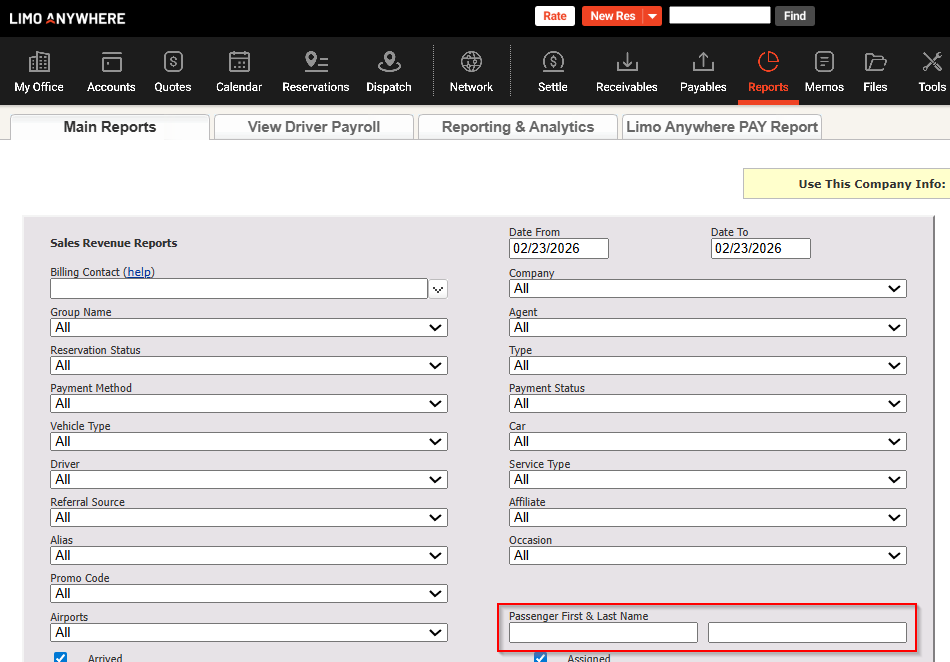 Passenger information needs to be entered exactly the way it has been entered on the reservation(s), excluding capitalization. It is not necessary for First and Last name to be entered, the system can find the reservations with only the First or Last name provided. Only First and Last name of the primary passenger can be entered, since the system will not be able to find additional passenger(s).
Step 4. Selecting the Report Type
Click on the dropdown, the default value is always – All Trips Sorted Chronologically and choose your preferred type.
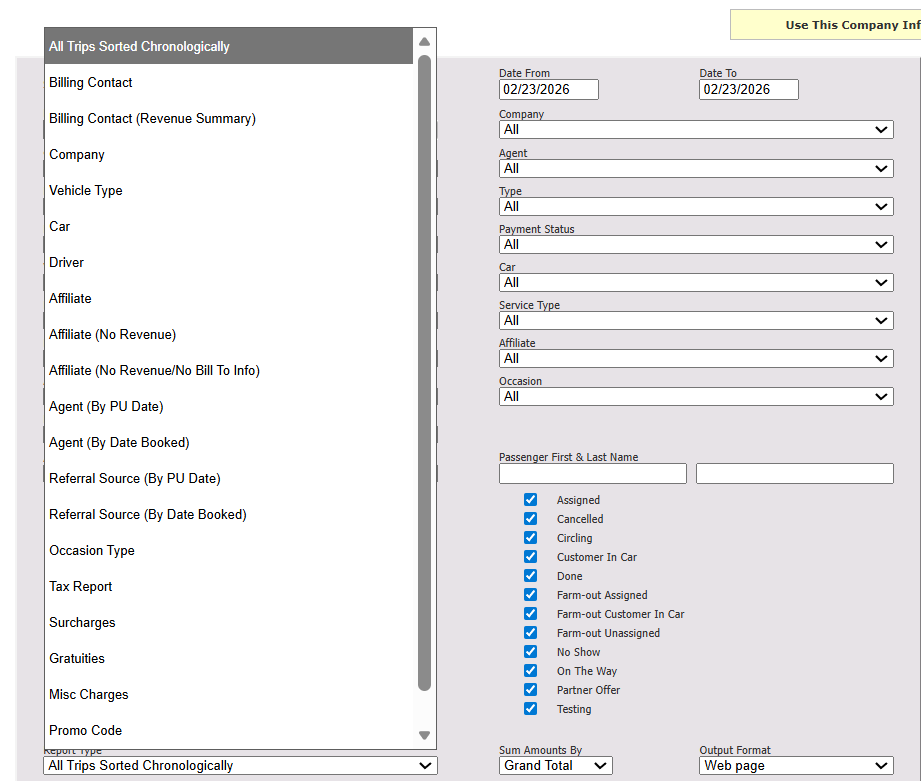
Types of the report:
- All Trips Sorted Chronologically
Generates a chronological report based on the Pick-Up Date – all previous selected factors will determine which reservations will be displayed. - Billing Contact
Generates a report where the reservations will be sorted per billing contact. - Billing Contact (Revenue Summary)
Generates a report with no reservations, only the summary for each billing contact included – if none are selected, All will be included for the selected Date Range. - Company
Generates a report where all reservations will be sorted per Company name. - Vehicle Type
Generates a report where all reservations will be sorted per Vehicle Type. - Car
Generates a report where all reservations will be sorted per Fleet Vehicle. - Affiliate
Generates a report where all reservations will be sorted per Affiliate. - Affiliate (No Revenue)
Generates a report where all reservations are sorted by Affiliate, excluding your company’s revenue.
- Affiliate (No Revenue/No Bill to Info)
Generates a report where all reservations are sorted by Affiliate, excluding your company’s revenue and Bill To information - Agent (By Pick-Up Date)
Generates a report where all reservations will be sorted per Agent and PU Date. - Agent (By Date Booked)
Generates a report where all reservations will be sorted per Agent and Creation Date (Date Booked).
- Referral Source (By Pick-Up Date)
Generates a report where all reservations will be sorted per Referral Source and by PU Date - Referral Source (By Date Booked)
Generates a report where all reservations will be sorted per Referral Source and by Creation Date (Date Booked). - Occasion Type
Generates a report where all reservations will be sorted per Occasion Type. - Tax Report/Surcharges/Gratuities or Misc Charges
Generates a report in which Total from all reservations will be shown, as well as Tax, Surcharges, Gratuities or Misc Charges fees will be broken down, respectfully. The KB article for rate groups can be found here - Promo Code
Generates a report where all reservations will be sorted per Promo Code used.
Step 5. Selecting Sum Amounts By option
Click on the Sum Amount by dropdown menu, shown on the screenshot below, and select from two options: Grand Total and Base Charges.
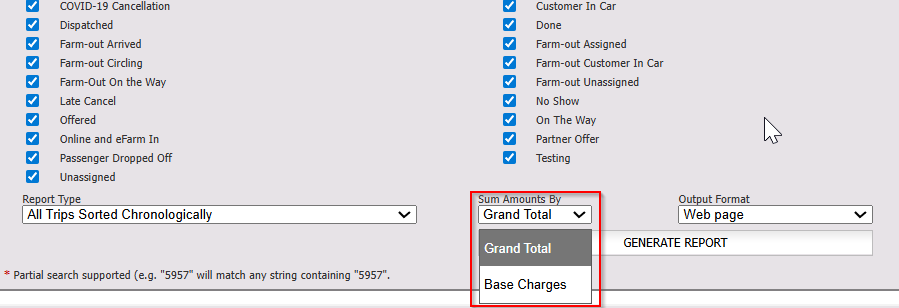
Grand Total will display all the charges on one reservation, while Base Charges will display only the stored rates where the rate grouping is Base Rate. To familiarize yourself with the rate grouping please click here.
Step 6. Selecting the Output Format
Output format has two options: Web page and MS Excel.
Click on the Output Format and select the preferred option from the dropdown menu, as shown on the screenshot below.
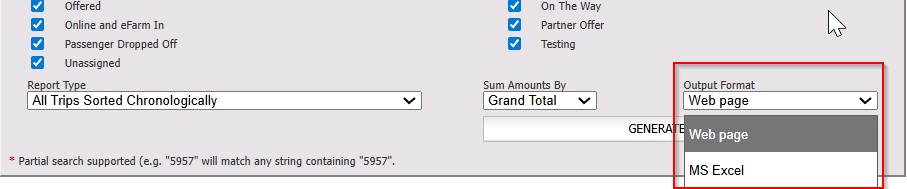
Web page will generate a report that will open a new tab in your browser and show the report online, while MS Excel will generate a .CSV file that will be automatically downloaded after clicking on Generate Report option.
Additional Options with MS Excel
If you choose to select MS Excel as the output format, options to include Itemize All Rates and/or Include Driver Payroll will be available, screenshot below.

Itemize All Rates option will add the full breakdown of all the fees/rates on all reservations included in the report.
Include Driver Payroll option will add the driver payroll for each reservation in the report.
To familiarize yourself with the Driver Payroll reports, go to the following knowledgebase articles: