Setting up Driven Anywhere
Driven Anywhere allows your customer to book a reservation easily from their mobile device.
You will need to make sure to follow the steps below to ensure your customer can book on a trip on Driven Anywhere.
Set System Default Service Types
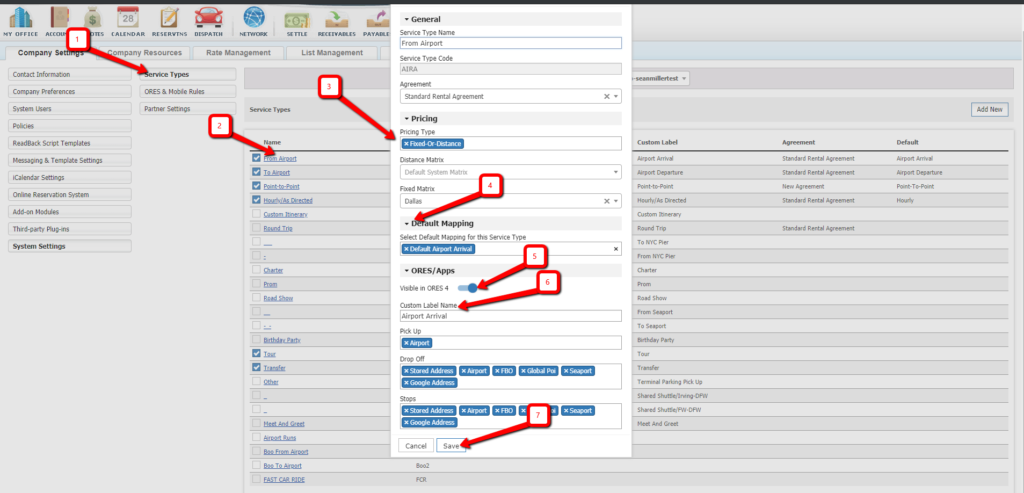
- My Office>Company Settings>System Settings>Service Types.
- Click on each Service Type.
- Select your Pricing Type for that service type.
- Assign the correct Service Type in Default Mapping:
- From Airport – mapped to – Default Airport Arrival.
- To Airport – mapped to – Default Airport Departure.
- Point-to-Point – mapped to – Default Point-to-Point.
- Hourly/As Directed – mapped to – Default Hourly.
- Slide the Visible in ORES 4 slider to the right to make the service type active for the online reservation system.
- Type in your Custom Label Name. (this is what your customers will see when booking online).
- Click Save to make sure changes are saved.

Set Time Restrictions and Option to Display Rates
- Go to My Office>Online Reservation System>ORES 4.0>Settings tab
- Set up your Time Restrictions for Creating Reservations and Modifying Reservations
- Set Calculate and Display Rates to YES or NO based on your preference

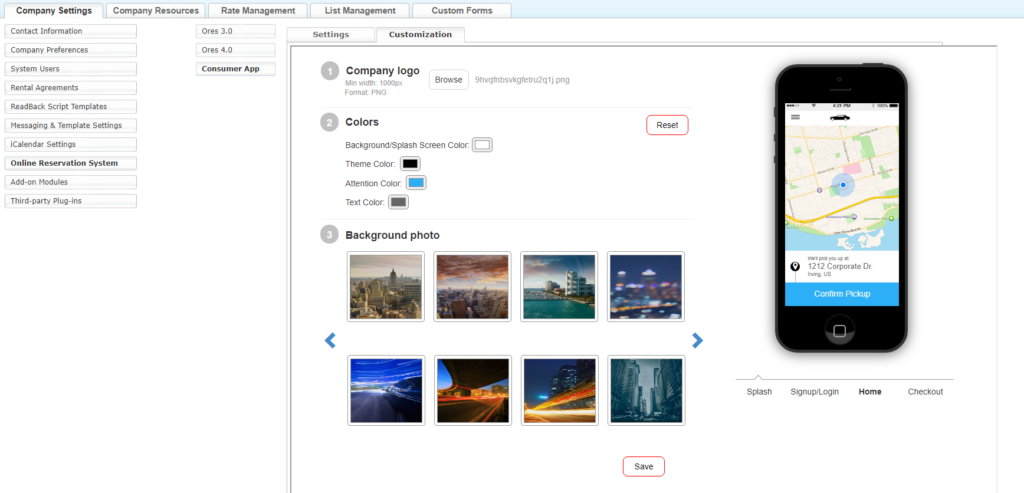
- Click on the Consumer App button.
- Customization: On the right hand side under the picture of the phone Select “Home” then you can change your colors to your liking and see an example of what it will look like to customer
- Be sure to Click “Save” button to save your changes

Note: Background Photo does not apply to Driven Anywhere only the White Label Passenger App
