Your company contact information provides essential ways for customers and affiliates to reach you. It’s also used on key documents like confirmations, trip sheets, and invoices, and serves as a reference for managing outgoing communication. Here’s how to manage it within Limo Anywhere
Accessing and Updating Contact Information
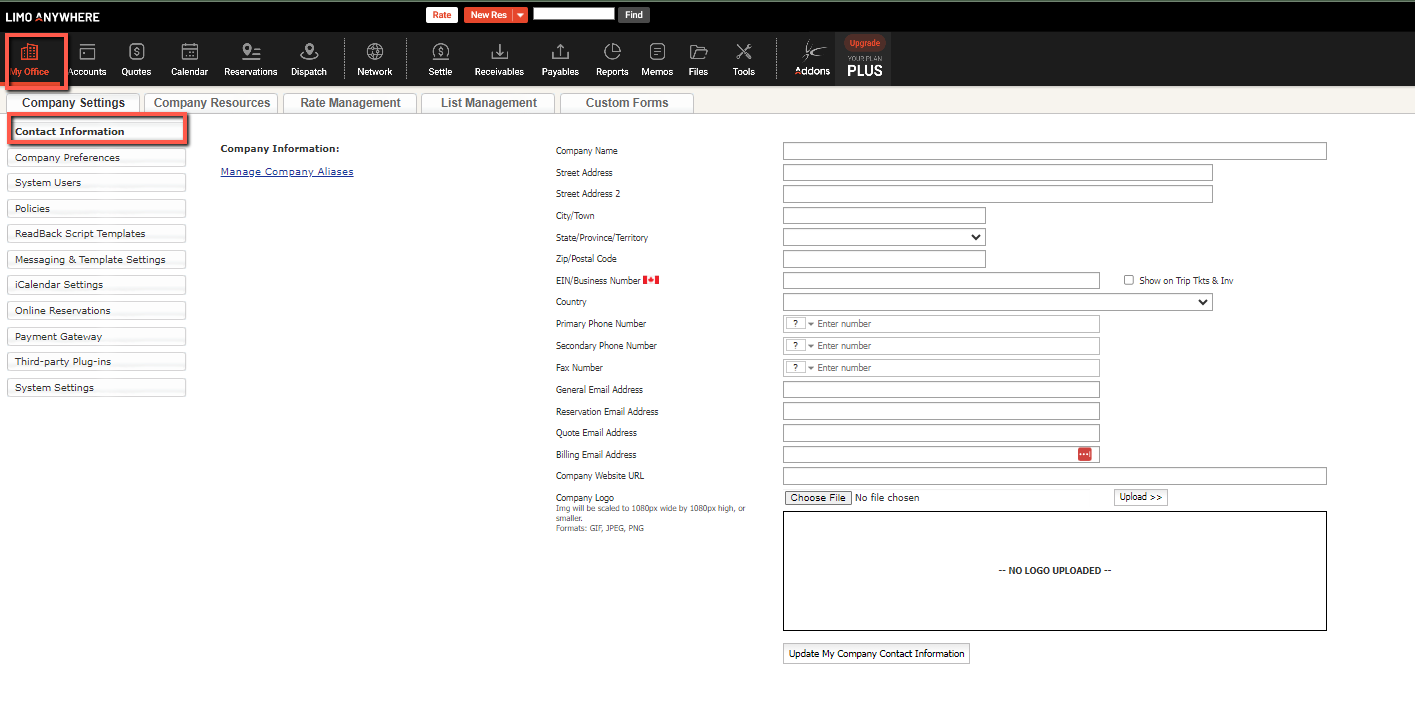
- Click the My Office icon on the toolbar.
- Go to the Company Settings tab.
- Click the Contact Information button.
Key Fields
- Company Name: Your business’s official name (displayed prominently on all forms).
- Address Fields: Enter your company’s street address, city, state, and zip code.
- EIN/Business Number: Your government-issued business identifier (e.g., EIN in the US, Business Number in Canada). Check your local laws regarding the display of this information on documents.
- Country: Your primary country of operation.
- Phone Number: Provide your main contact numbers (the Primary Phone Number will appear on all forms).
- General Email Address: Your main email address for customer communications.
- online reservation response emails are sent from this address
- Note: This can be overwritten to use the current system user’s email.
- Quotes Email Address: The address where incoming quote requests will be received. Incoming quote request emails will not fall back to the general email address if this field is left empty.
- Reservations Email Address: Will receive online reservation notifications (new reservation) Also used to receive copies of all outgoing reservation confirmations.
- Billing Email Address: Sending Email address used for outgoing invoices sent from Limo Anywhere. If this is left blank, it will fall back to the general email address.
- Company Website URL: Your website address.
- Company Logo:
- Upload a logo in GIF or JPEG format (maximum 1080×1080 pixels).
- Important: A logo will replace the text-based contact information on standard forms. If you want both, either include the contact info within your logo image or consider the Custom Forms module.
Saving Your Changes
Always click the Update My Company Contact Information button at the bottom of the page to save your changes.
For complete information on using the Alias Module see How To Establishing and Managing Company Aliases