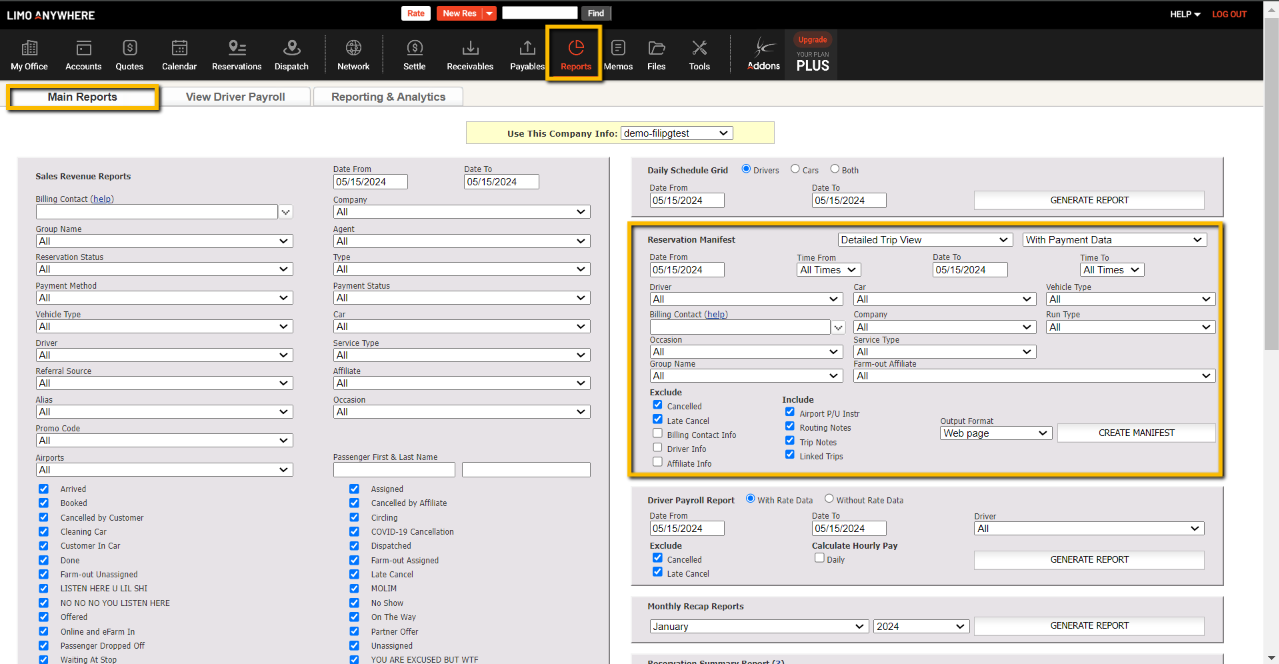
Find the Reservation Manifest Report creation box (2nd option from the top in the right hand column).
Select either ‘Detailed View’ or ‘Summary View’ from the drop down list. Detailed View allows you to see more information, such as the Trip Notes as well as well as info for any trips linked with the original.
Select either ‘With Payment Data’ or ‘Without Payment Data’ from the drop down list to determine if customer payment data, such as the Payment Type and Trip Total, will be included on the report.
Select the ‘Date From’ and ‘Date To’ that is appropriate for the days to be included on the manifest.
(OPTIONAL) Select the ‘Time From’ and ‘Time To’ to narrow the time period that the manifest will be produced for.
(OPTIONAL) You can filter the report further by selecting a ‘Driver’, ‘Car’, ‘Vehicle Type’, ‘Billing Contact’, ‘Company’, ‘Run Type’, ‘Occasion’, ‘Service Type’, ‘Group Name’, and ‘Farm-out Affiliate’ from the drop down lists.
HELPFUL HINT: Type in the first two letters of the Billing Contact name and select the correct Billing Contact from the displayed list.
(OPTIONAL) To ‘Exclude’ the ‘Cancelled’, ‘Late Cancel’, ‘Billing Contact Info’, ‘Driver Info’, and ‘Affiliate Info’ from the report, check the boxes to the left of each option.
(OPTIONAL) To ‘Include’ the ‘Airport P/U Instr’ (Airport Pick up Instructions), ‘Routing Notes’, and ‘Linked trips’ into the report, check the boxes to the left of each option.
Select the manifest ‘Output Format’ as either ‘Web Page’, ‘Send Email’, ‘Excel-Standard’ or ‘Excel-Inline’.