The company administrator can adjust permissions for every system user so their access is tailored to their job responsibilities. Follow the steps below for adding and managing system users:
Adding a New System User
Restricting System User Access
New System User Password Creation Process
Blocking a System User from Accessing Limo Anywhere
Resetting a System User Password
Adding a New System User
- Click on the ‘My Office‘ icon in the toolbar.
- Click on the ‘Company Settings‘ tab.
- Click on the ‘System Users‘ button.
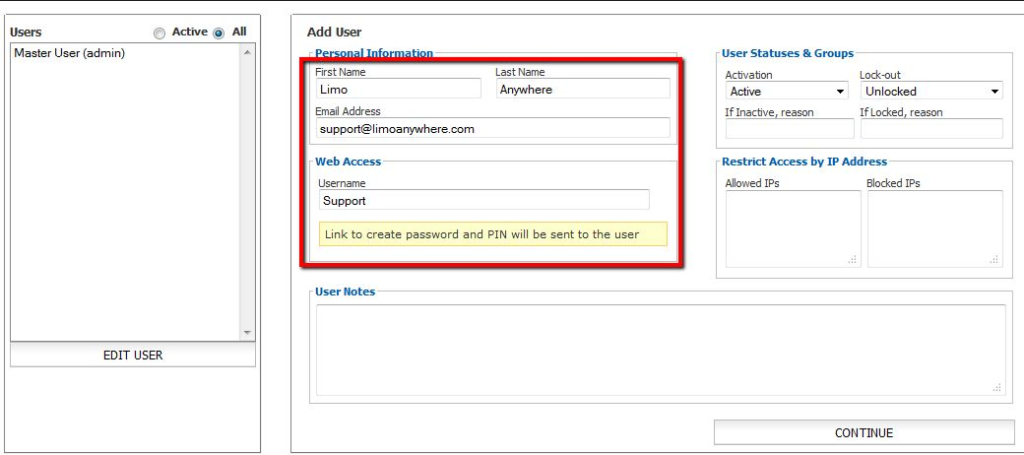
- Fill in the User’s ‘First Name‘, ‘Last Name‘, ‘Email Address‘, and make up a ‘Username‘.
- Click the ‘Continue‘ button.
Note: It is imperative the email address is entered correctly as the user will receive an email to complete the registration for their account.
Restricting System User Access
Limo Anywhere has a number of security features that help protect your business and your customer’s data. You can keep your account secure by restricting a system user’s access to only be able to access certain areas of Limo Anywhere, restricting log-in access to certain times and days, and/or restrict access from a certain computer via IP or only allow system users to log-in from a certain IP address. Setting up these types of restrictions will reduce the possibility of unintentional errors or malicious acts.
By default new users do not have any restrictions applied to their profile which gives them full access to Limo Anywhere. System User restrictions can be set at any time by a company administrator.
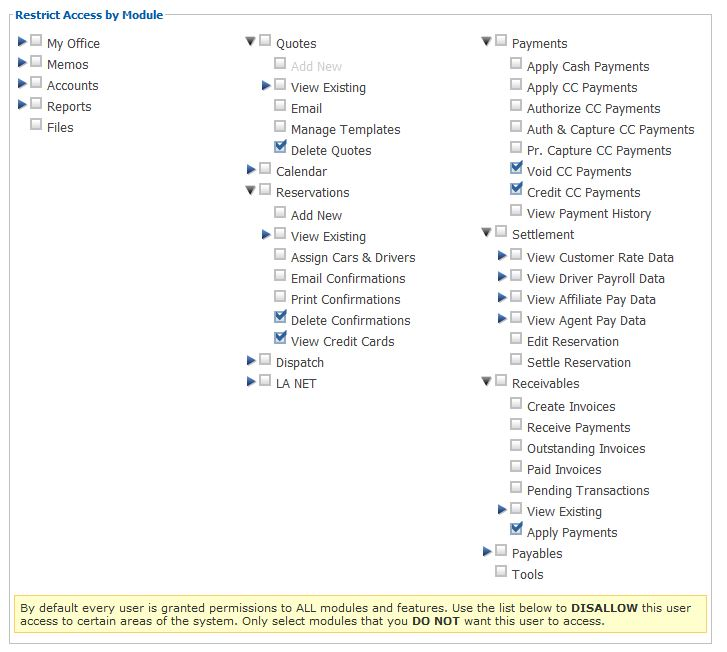
Under ‘Restrict Access by Module’ select the specific parts of the system to DISALLOW access to this user.
In the example below this user has been restricted from ‘My Office’, ‘Reports’, ‘Dispatch’, ‘Settlement’, ‘Receivables’, ‘Payables’. Make note of the yellow box which warns that by default a new user has access to every module in Limo Anywhere until restricted by selecting that module as below.

Further detailed restrictions can be made in each module by clicking the ‘blue arrow’ indicator next to the module name thus exposing sub portions of the module. Illustrated below all selections have been expanded for illustration purposes. For example here a System User has been blocked from Receiving or Applying Payments in Receivables but is allowed to Create Invoices.
When a parent category in the module is blocked all the sub-portions will be blocked by default as well.
Restricting Access by Day and Time
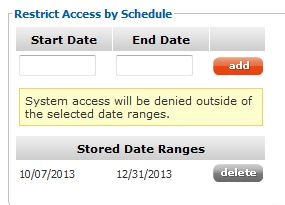
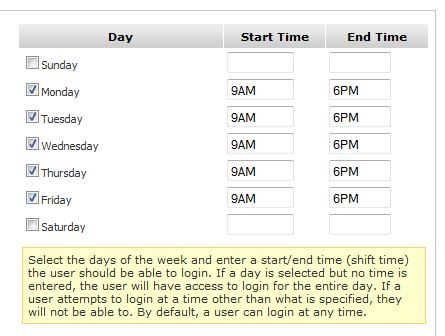
There are two ways to ‘Restrict Access by Schedule‘:
- Access can be allowed between a certain start and end date. This may be useful for temporary employees or an employee that is a contractor for a specific period of time. In the example below the employee is allowed access only between October 7th, 2013 to December 31, 2013.
- Access can be allowed based on an employee’s work schedule. In the example below the user is allowed access only between the hours of 9AM and 6PM, Monday through Friday.
Restricting Access From a Specific Computer
Under ‘Restrict Access by (static) IP Address’ enter the static IP addresses for the computers that are allowed to access the system by this System User in ‘Allowed IPs’ field. It is also possible to block access from a static IP addresses if know by entering them in the ‘Blocked IPs’ field.
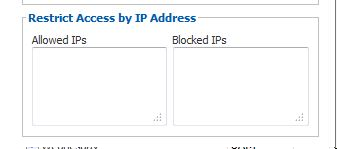
All of the restrict access features can be used alone or in tandem with each other. It is possible to restrict by module, schedule, and IP address simultaneously for any or all System Users. Be sure to click the ‘Update User’ button to save any changes you made before leaving this page.
New System User Password Set Up Process
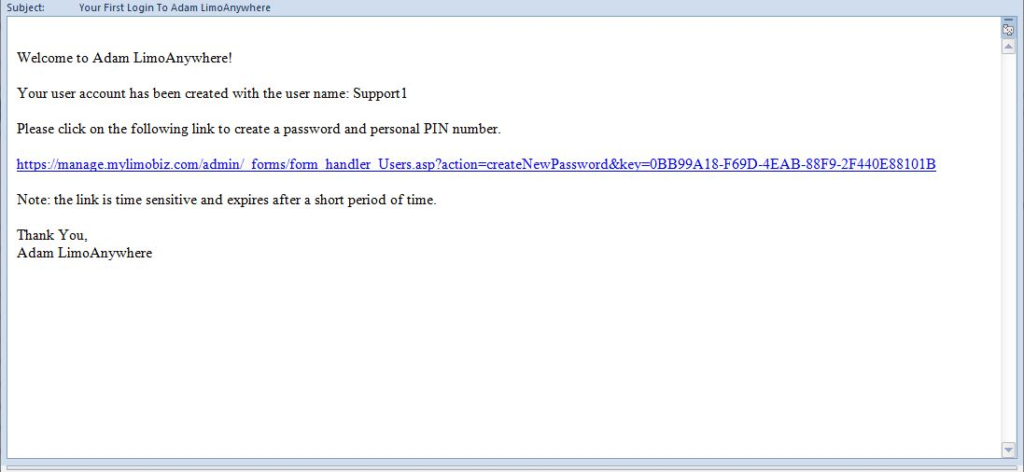
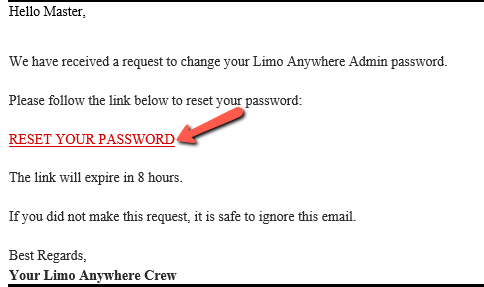
- The new system user will need to check their email address that was set up in there system user profile. The email will look similar to the one below.
- Click the hyper link in the email.
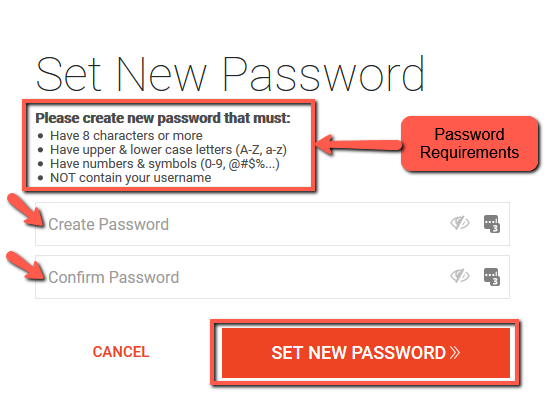
- Create the ‘Password‘ using the PCI-DSS criteria listed above.
- Click the ‘SET NEW PASSWORD‘ button.
Blocking a System User from Accessing Limo Anywhere
- Click on the ‘My Office‘ icon in the toolbar.
- Click the ‘Company Settings‘ tab.
- Click on the ‘System Users‘ button.
- Select the User you need block from Limo Anywhere from the ‘Users‘ list.
- Click the ‘Edit User‘ button.
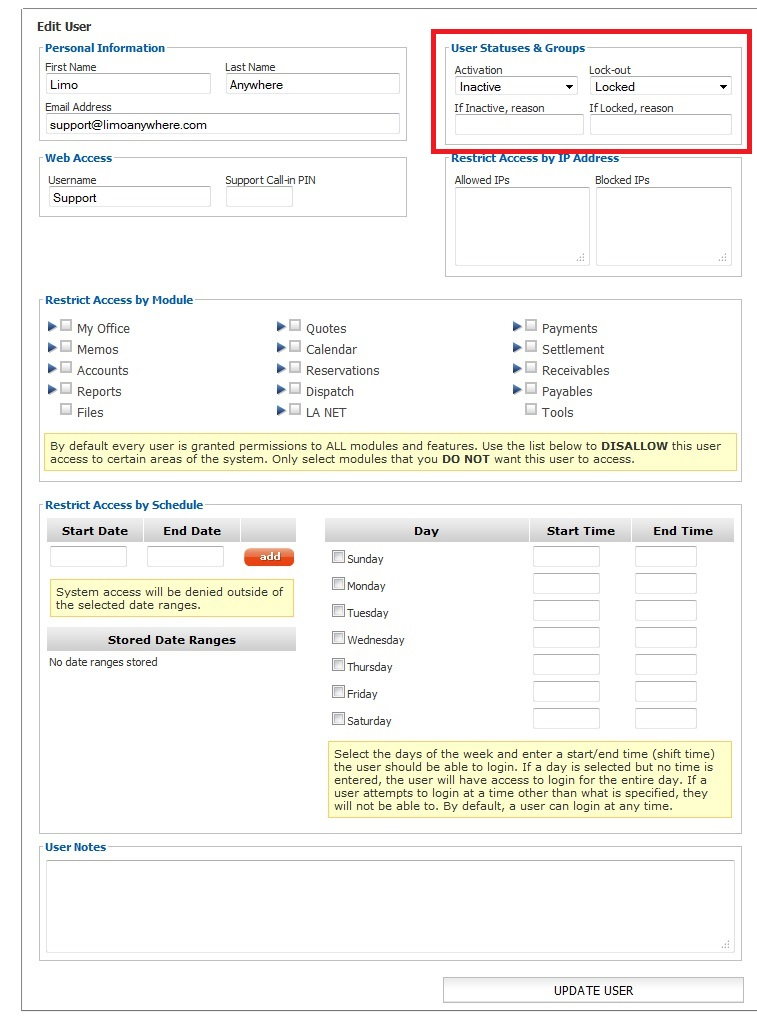
- Set the ‘Activation‘ drop down box to ‘Inactive‘.
- Set the ‘Lock-out‘ drop down box to ‘Locked‘.
- (OPTIONAL STEP) Add a reason for the the ‘Inactive‘ and ‘Locked‘ status.
- Click the ‘Update User‘ button.
Resetting a System User Password
On the log in page click the link ‘Forgot Password‘.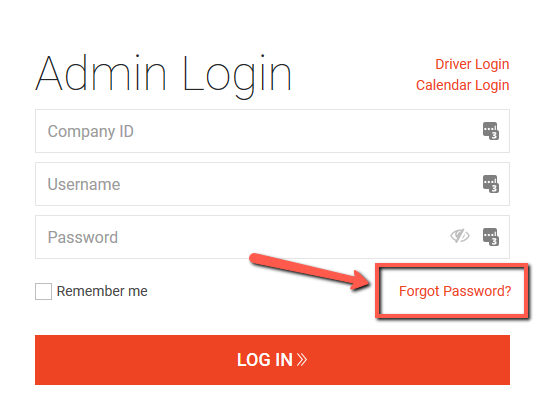
On the ‘Forgot Password‘ page enter the Company ID, username and click the ‘SUBMIT‘ button.
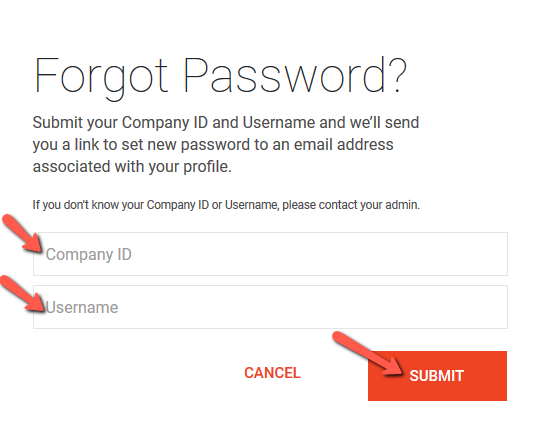
An email will be sent to the email address provided in the system user profile.
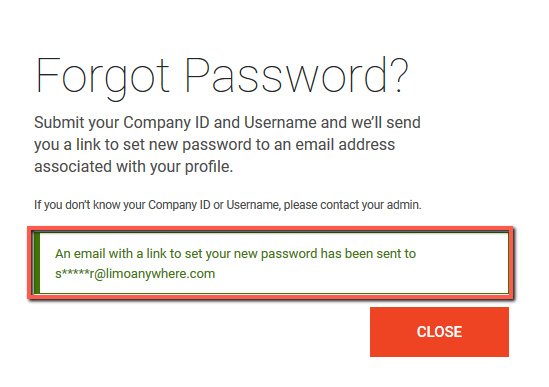
Email Example:
On the ‘Set New Password‘ page enter the new password in the ‘Create New Password‘ field. Repeat the password in the ‘Confirm Password‘ field.
NOTE: The password requirements are shown above these fields.
After password is created and confirmed click the ‘SET NEW PASSWORD‘ button.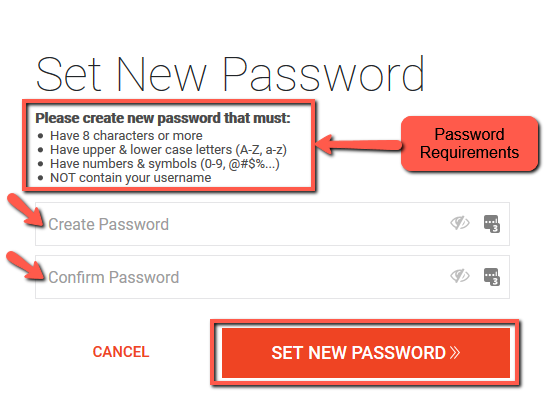
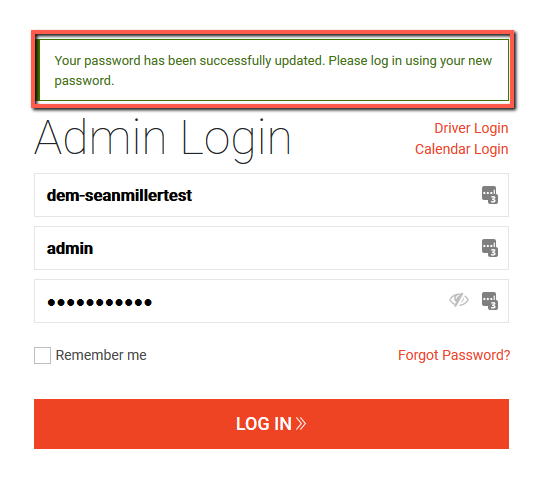
You will now be taken back to the log in screen that will display the message ‘Your password has been successfully updated’.
Please log in using your new password.
