Creating a Reservation
The easiest method to open a new reservation is to use the green ‘New Res‘ button found at the top of Limo Anywhere.
When creating a new reservation, there are three main items needed to save a reservation:
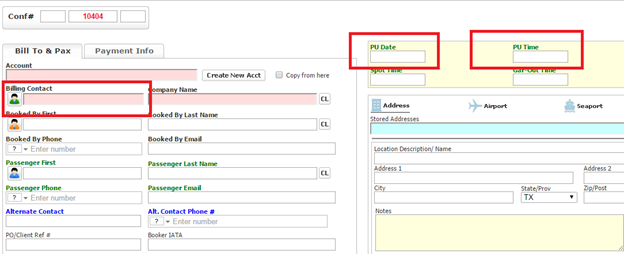
- a name in the Billing Contact field
- a pick up date in the PU Date field
- a pick up time in the PU Time field
Note: in some cases, sites may set an additional requirement for payment method to be set prior to saving a reservation.
Once these have been set on a reservation, you can proceed with saving the reservation to edit it later or to continue on entering information as needed.
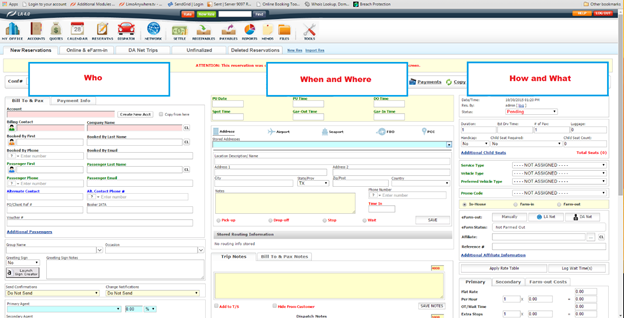
The reservation page can be divided into three sections:
- WHO: The left side of a reservation answers the question “who,” as in who is paying for the trip (Billing Contact) and who is taking the ride (Passenger).
- WHEN AND WHERE: The middle section of a reservation answers the questions ‘when and where’, as in when this trip is and where is the passenger coming from and going to.
- HOW AND WHAT: The right side of a reservation answers the questions ‘how and what,’ as in how much will this trip cost and what services are being requested.
The ‘Who’:
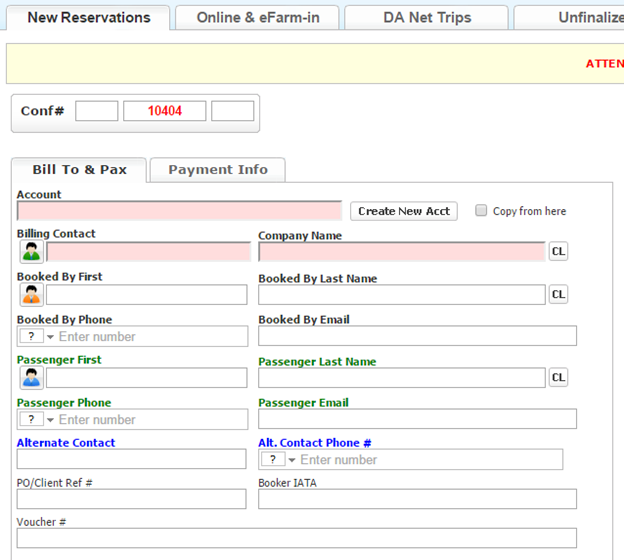
To start after opening a new reservation, typically, the billing contact is entered first. The billing contact will be the person or entity that will be paying for the trip. In many cases, the billing contact will have a customer account in your system but does not necessarily need one to be listed as a billing contact.
If it is a booking contact that is calling to create a reservation on behalf of a passenger, you will list the booking contact in the ‘Booked by First / Booked by Last Name’ fields and include the booking contact’s phone number and email address in the appropriate fields.
The passenger’s information will be entered in the appropriate “passenger” fields. For the Passenger Phone field, it is highly recommended that you enter the passenger’s mobile number so that any automated text messages (that may later be configured in the system) will be sent to passenger’s mobile phone.
The “When and Where”:
Next, you will need to enter the pick-up date and pick-up time in the appropriate fields for this trip; the other remaining time fields in this section do not necessarily need to be filled in.
Below the time field section is where you will enter the pick-up and drop-off information for this trip. The icons across the top (Address, Airport, Seaport, FBO and POI) will contain any stored information in your system. You will need to select the appropriate icon to set up the correct input fields for each pick-up/drop-off location.
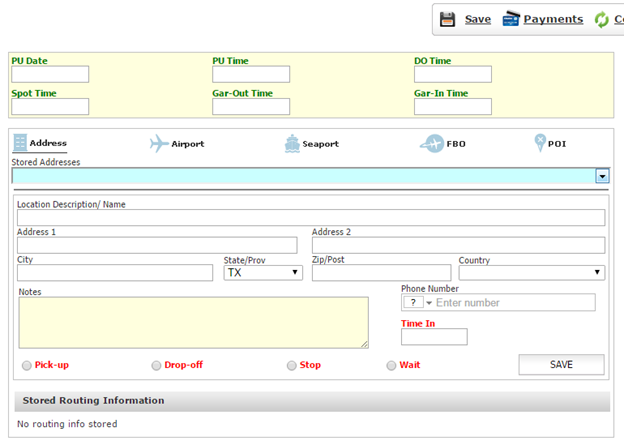
For example, on an airport pick-up, you will click on the Airport icon to change the input fields for entering airport and flight information; after entering the airport pick-up information, click the Pick-up radio button which will move the pick-up information to the Stored Routing Information section below. Next, then click the Address icon to change the input fields for entering a physical address; after entering the address, click the Drop-off radio button to save the address as the drop-off location.
Any location entered in this section can be saved as either a Pick-up, a Drop-off, a Stop, or a Wait.
The Stored Routing Information section will contain the pick-up and drop-off locations entered previously (as well as any Stop or Wait locations that may have been entered).
The “How and What”:
After entering in the routing information, you will need to set the Service Type associated with this trip and the Vehicle Type requested by the customer. It is important to set the correct Service Type and Vehicle Type for the trip as certain rates may be dependent upon what Service/Vehicle Type is selected.
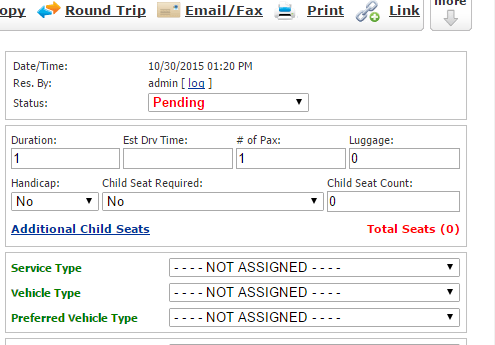
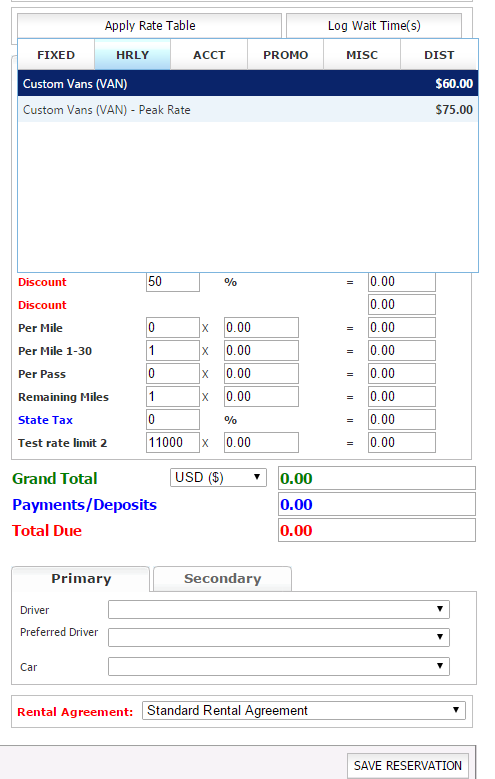
After setting up the routing, service type, and vehicle type, you are ready to apply rates to the reservation. First, click on the ‘Apply Rate Table‘ button to display the available rates for this reservation.
Note that different types of rates may be available to be applied to this reservation — most common will be Fixed rates, Hourly rates, and Distance-based rates. Also available will be Account rates (special rates that are pre-configured for a particular customer account), Promotional rates, and Miscellaneous Fees. Second, determine which type of rate is to be applied and select the appropriate button (i.e. choose the HRLY button to apply any configured hourly rates). Finally, click on the rate to be applied which will proceed with filling in the appropriate rates in the Primary and Secondary tabs as well as determine the total balance due.
When the trip is ready to be assigned to a driver, you will select the driver from the drop-down menu at the bottom of the reservation screen and then select a car appropriate to the customer’s request.
(The driver and car selection can also be done from the dispatch screen.)
