Applying a Rate Matrix to an Account
A Rate Matrix is a quick and easy way to apply rate tables to an account. When applied to an account the Rate Matrix will act as Account Rates for that account, giving the account a rate that differs from regular rates for the purpose of stimulating demand or rewarding volume for example.
What is a rate matrix?
It’s a set of prices you want to give to specific clients. For example a new or a “standard fare” client can receive a set of prices form a rate matrix called default, or standard prices. This means that they are getting you basic pricing that everyone else gets.
Now imagine that you have corporate clients you want to have special pricing, or VIP clients you have to give specific rates too. We can have a different matrix set up for each of these and tie them to their account, so that when they log in, they see the special prices you want them to see.
A Rate Matrix can either be ….
- Fixed Rates between a pair of Zones for a specific Vehicle Type. (This is set up in My Office> Rates> Fixed Rates and Zones.)
- Per Hour for a specific Vehicle Type (This is set up in My Office> company Resources> Vehicle Types.)
For information on establishing a Rate Matrix see the Knowledge Base articles Establishing and Managing the Fixed Rate Matrix, and Establishing and Managing a Hourly or Per Passenger Rate Matrix.
Applying a Rate Matrix to an Account
- Click on the Accounts icon on the toolbar.
- Locate the account to which the Rate Matrix is to be applied to.
Note: When deciding the account to apply a rate matrix to it is important to keep in mind if that account is a Billing Contact or a Passenger. If the Rate Matrix is applied to a Passenger account it will only apply to that Passenger. If the Rate Matrix is applied to a Billing Contact it will apply to all Passenger accounts that are tied to the Billing Contact, assuming a Passenger does not have a different Rate Matrix applied. In order to apply a Rate Matrix across an entire Company with multiple Billing Contacts the Rate Matrix would need to be applied to each Billing Contact in that Company. - Double click on the account, or click on the account and then click Edit to open the account in edit mode.
- Select the Financial Data tab.
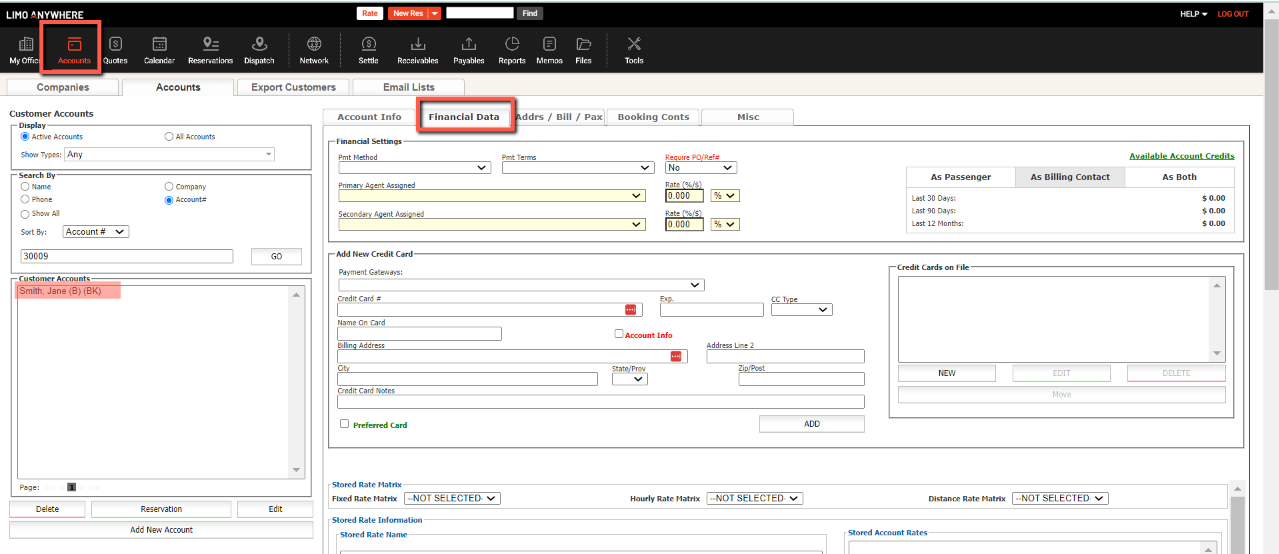
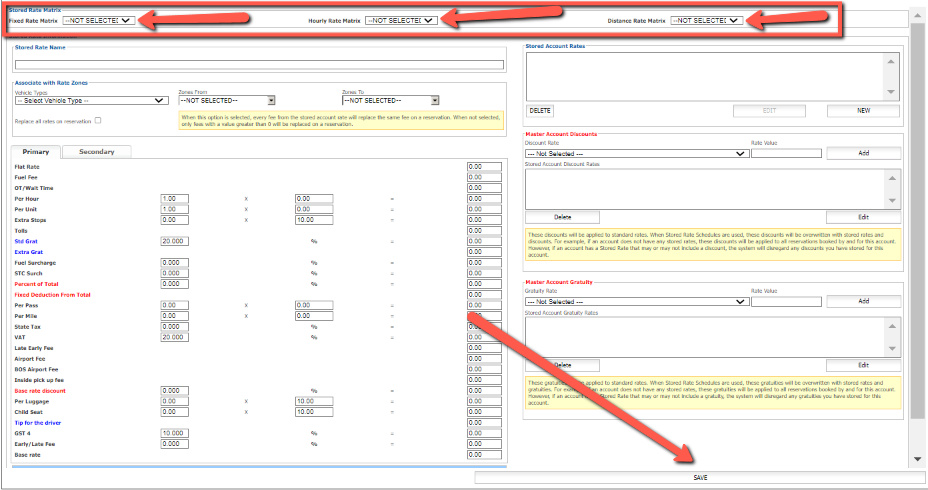
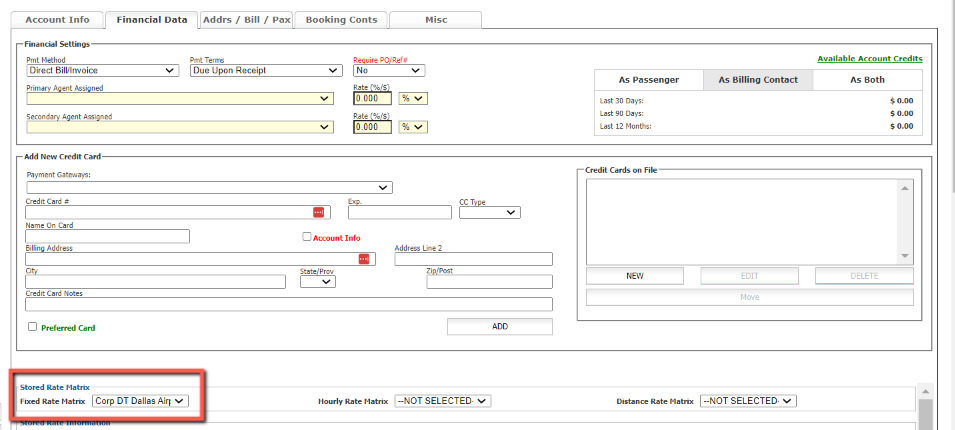
- To add a Fixed Rate Matrix: Select the appropriate Fixed Rate Matrix from the drop down list.
- Click “Save” (bottom of page) to retain the selection.
- To add a Per Hour/Per Passenger Rate Matrix: Select the appropriate Per Hour/Per Passenger Rate Matrix from the drop down list
- Click “Save” (bottom of page) to retain the selection.
- To add a Distance Rate Matrix: Select the appropriate Distance Rate Matrix from the drop down list.
- Click “Save” (bottom of page) to retain the selection.

How an Applied Rate Matrix is Utilized
Once a Rate Matrix is applied to an account those rates will appear in the Fixed, Hourly or Distance rate tab either in the Online Reservations System (ORES) if the account books their own trips, or in the Limo Anywhere Core System when the Apply Rate button is clicked in a reservation IF THE TRIP BOOKED MEETS THE PARAMETERS OF THE RATE STORED IN THE RATE MATRIX.
Note: This differs from the Account Rate function entered without a matrix where Account Rates only appear in the account Rate tab.
Note: This differs from the Account Rate function entered without a matrix where Account Rates only appear in the account Rate tab.
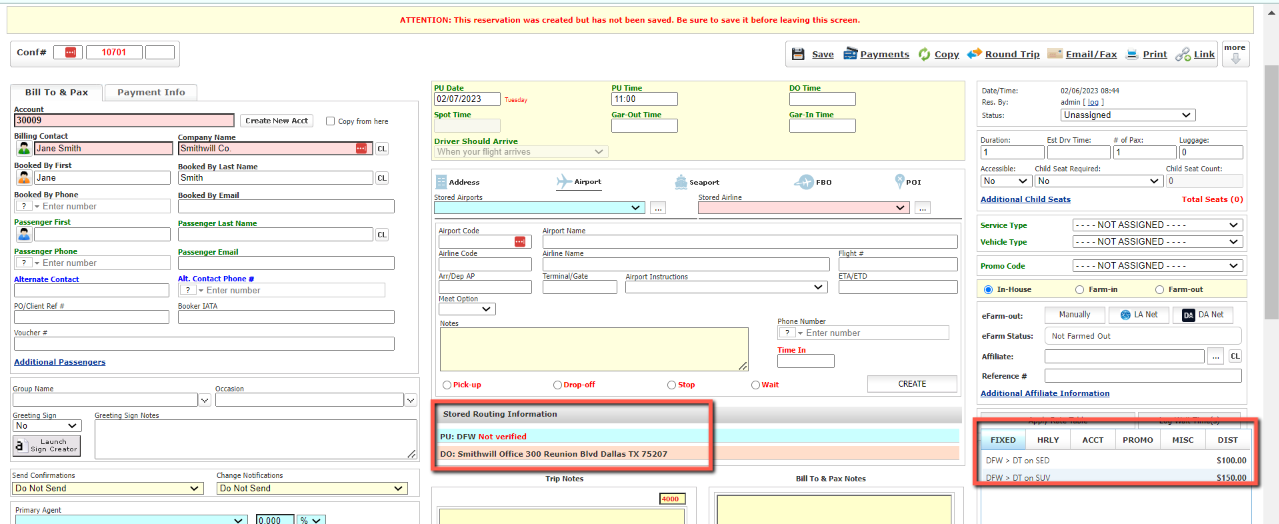
In the example below a Rate Matrix (Corp DT Dallas Airport) that offers reduced rates between downtown Dallas and the Airports for the Vehicle Types Sedan and Luxury SUV was applied to the Smithwill Co. account. Below a reservation is made from the Smithwill office to DFW for a Sedan. The Sedan rate for this routing from the Corp DT Dallas Airport Rate Matrix is displayed and can be selected.
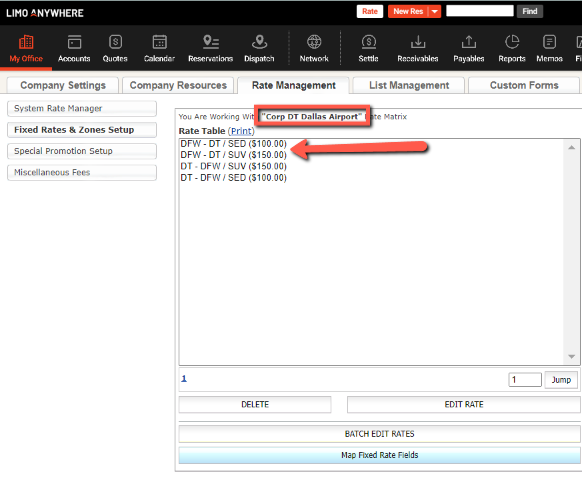
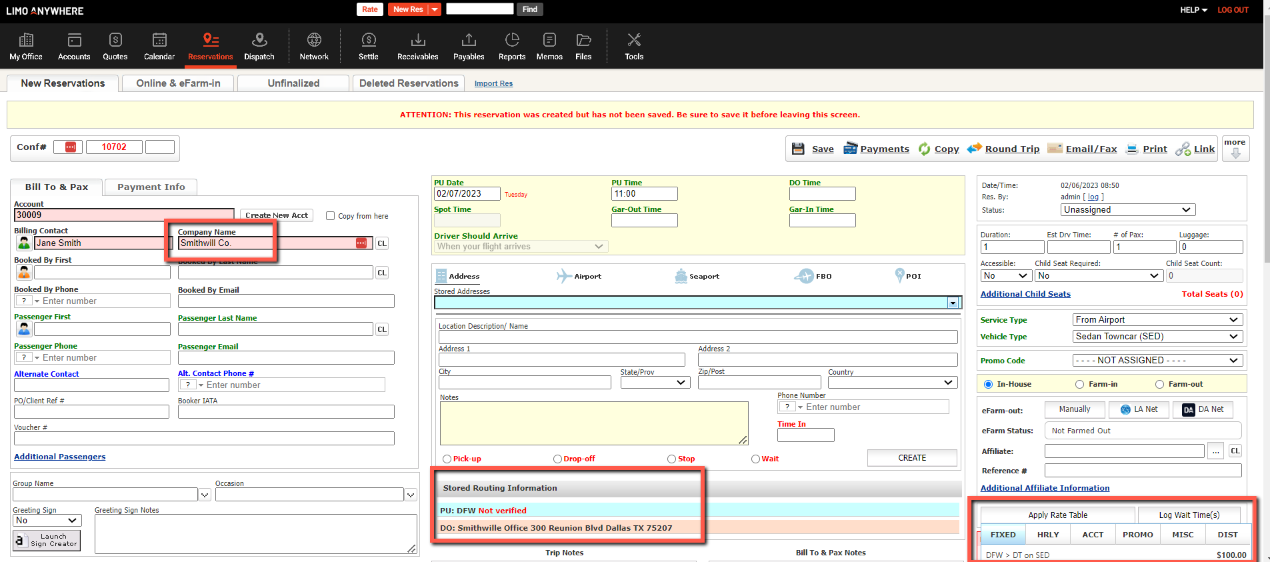
If the Vehicle Type is changed on this reservation to Luxury SUV the rate displayed will be the Luxury SUV rate for this routing from the Corp DT Dallas Airport Rate Matrix is displayed and can be selected.
