Purpose

The reason to add the AddOns.LA Lead Form to your website is to allow you to
- Collect leads from site visitors.
- Track your marketing metrics (which ad campaigns and sources are driving ROI).
- Provide immediate quotes to customers.
- Prevent customers booking rides when sold out.
- Adjust prices for holidays, high/low demand dates, service areas, etc.
- Automatically follow-up with leads who have not converted.
How does our form do all of that? It runs a little piece of code on your site, called JavaScript, which injects a specially-tailored Lead Form which is built inside your AddOns.LA account. This code puts the form into a frame on your site, specifically using an iFrame.
This means you do not need to try to build iFrames in your own site, you do not need to create custom JavaScript files and you do not need to copy/paste the form’s source code. You don’t need to do anything except copy the Embed Code (explained below).
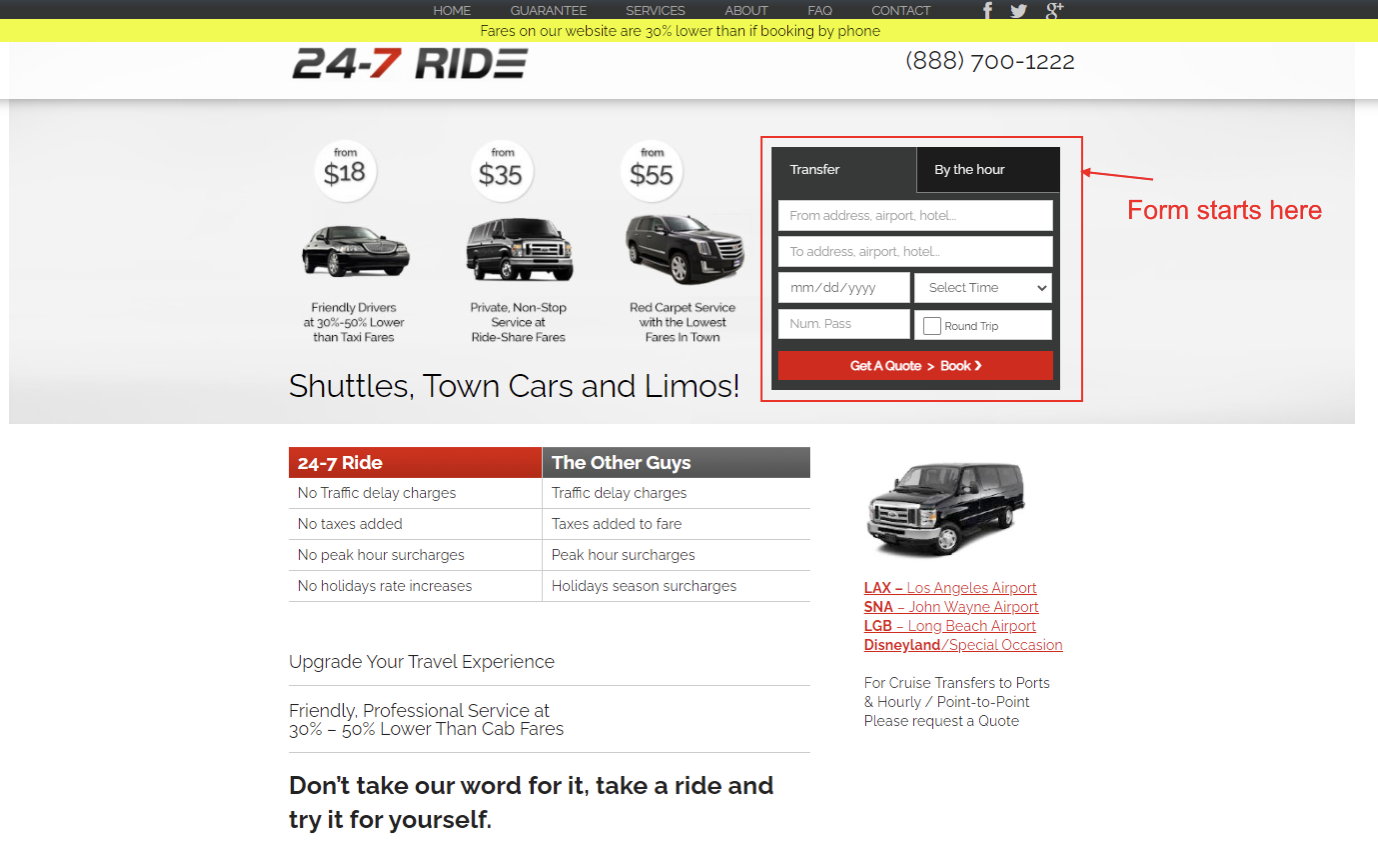
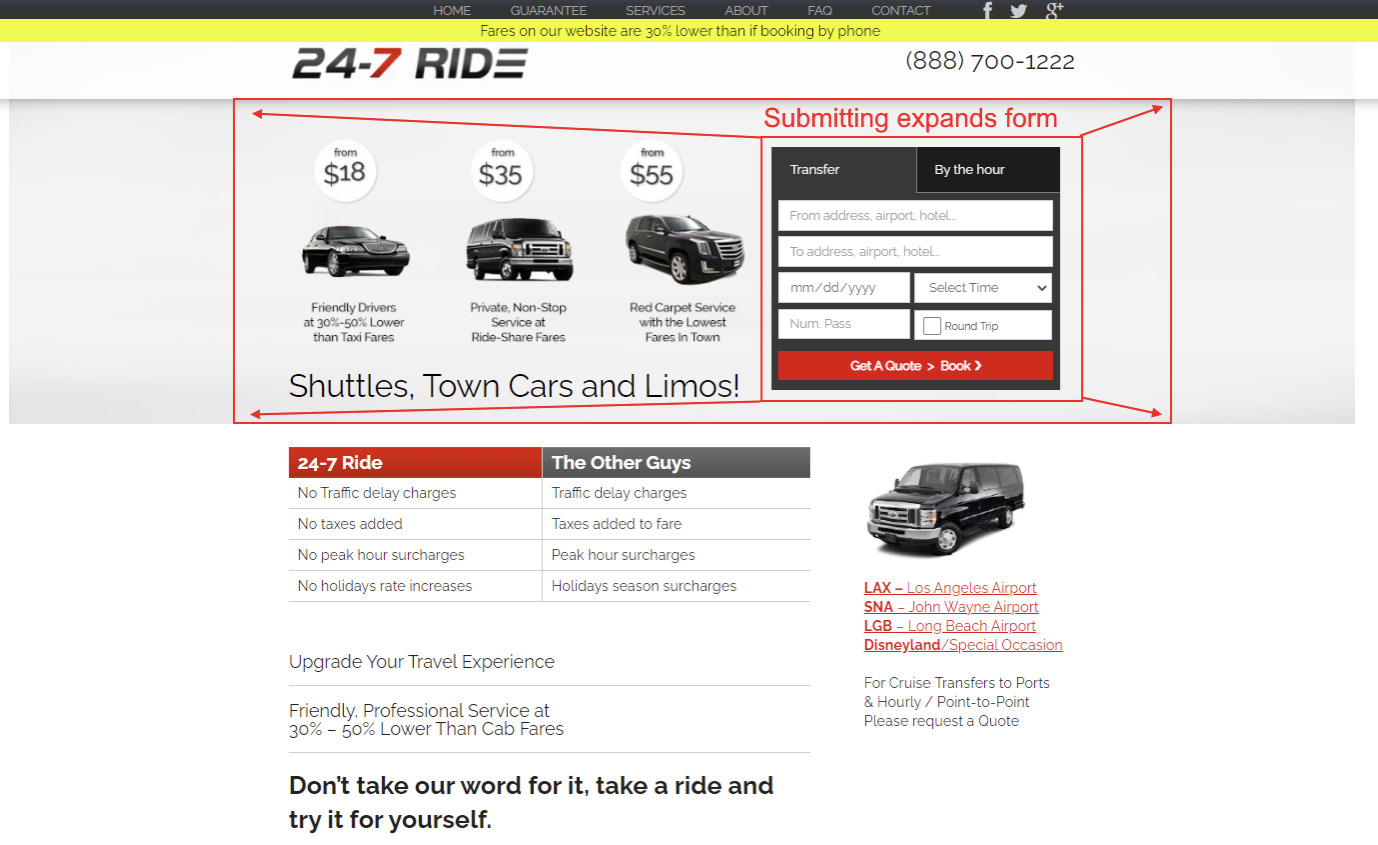
The form is designed to take up a space on your site, with the ability to “expand” to use more screen size upon submission of the form (without the user ever leaving your site’s URL, like www.acmedemo.com).

Notice how the form grows into an ancestor element (that is: a parent, grandparent, great-grandparent, etc.) on the page. This is important later, and covered by the Outer Selector section.
After expanding it looks like so:
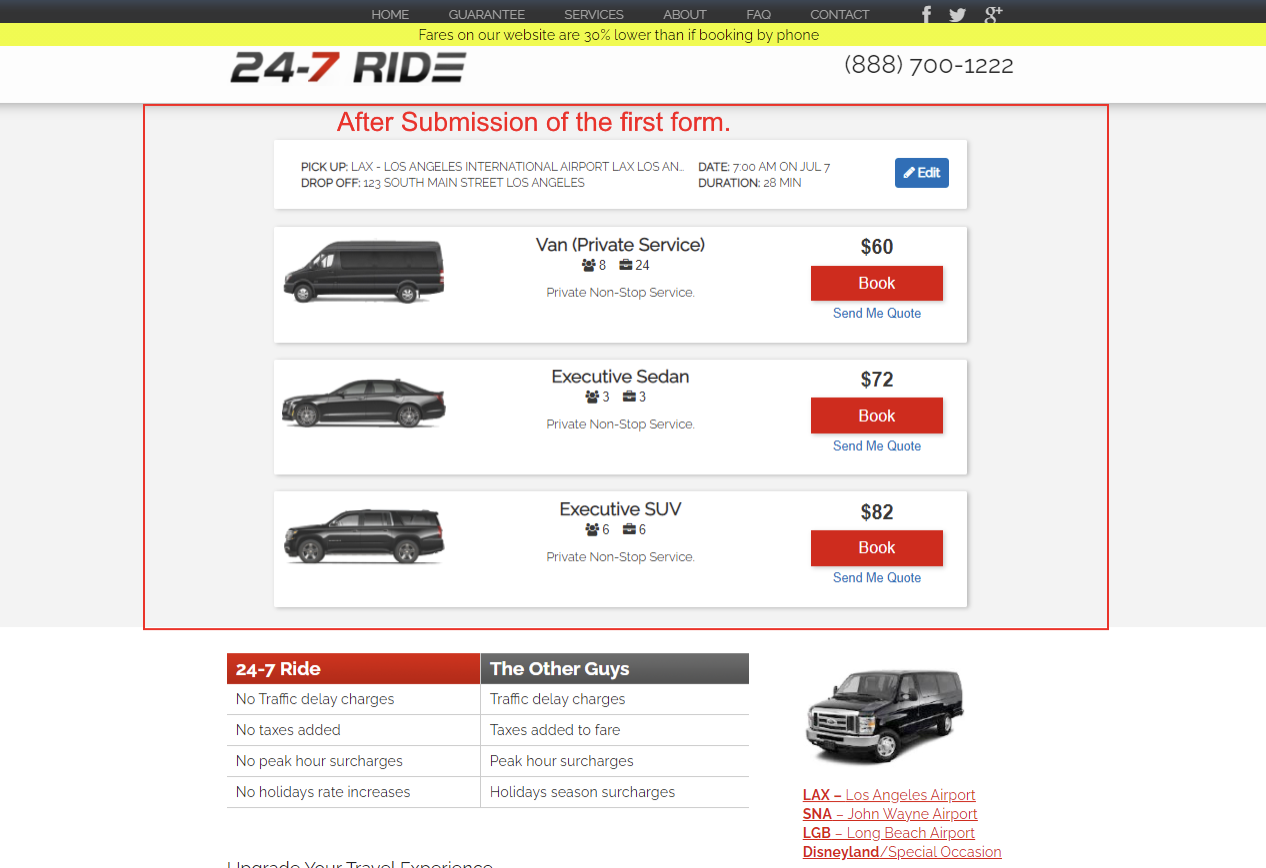
Note that the widget code automatically adjusts the height on every page as needed. Again, you do not need custom code.
Configuration
You can find the Lead Forms in the navigation under the Lead Quote pane in the left-hand navigation.
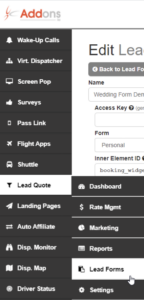
You can edit or create a new form and the pane will look like the following:
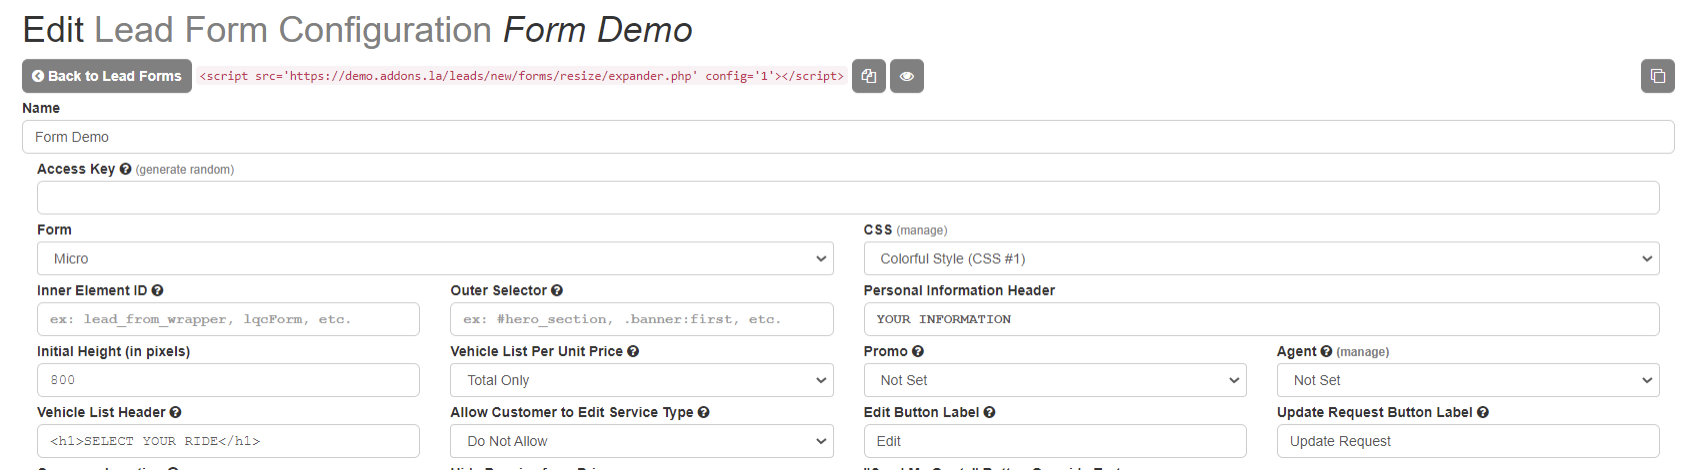
There are five important parts of this form. They are:
- Embed Code
- Form
- Inner Form ID
- Outer Selector
- CSS
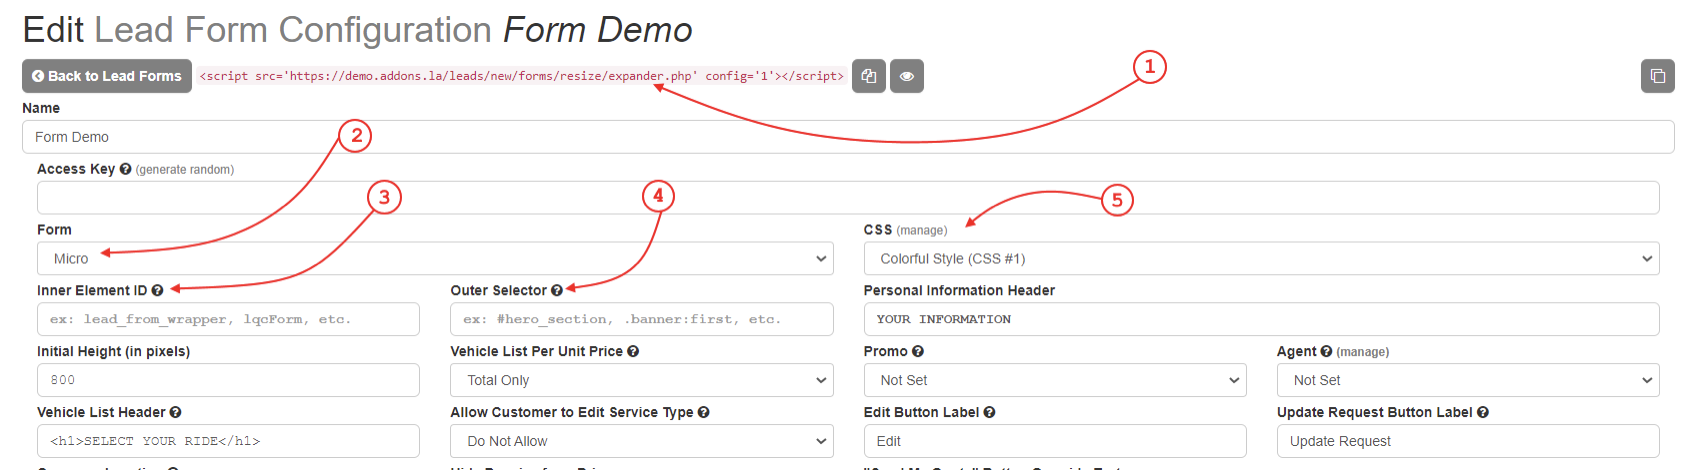
1. Embed Code
The embed code is placed on your website to host the lead form. You can simply place the snippet of code on your site wherever you want the form to appear. It is a script which reads in all of the settings you configure on this page, that way if you want to make a change to the form you don’t have to access your hosting code again.
For placement on the page you can optionally also use the Inner Element ID to make the form appear somewhere else, which is discussed below.
2. Form
This is the type of form you want to use. There are several options, but the most common ones are Center, Micro and Contact. Different forms were built for different use cases, so the options on the page change depending upon which form you use. For example the Contact form collects contact information on the first page (hence the name Contact form), while the Micro form was built to be very small, and the Center form is designed to be front-and-Center.
3. Inner Element ID
This tells the script where on the page to display your lead form. It looks for the HTML element on the page with the given ID and puts the form inside of it, overwriting any existing contents.
The specified ID is illustrated by the red box below:

To get more technical: webpages are built with HTML elements. Here is a short sample:
<div id="main" class="column">
	<h3>Efficiently Unleash</h3>
	<p class="blue large-text">
	Lorem Ipsum is simply dummy text of the printing and typesetting industry. Lorem Ipsum has been the industry's standard dummy text ever since the 1500s.
	</p>
	<p id="sample">
	<a class="btn btn-default" href="google.com">
			Search
		</a>
	</p>
</div>
In this sample we have 5 HTML elements. Elements are the blocks which start with an opening tag like <div> and ends with a closing tag, like </div>. In that example it is a div element, though in the example above you’ll find an h3 element and two p elements inside of that div (with an a element inside of the second p).
<div id="main" class="column">
	<h3>Efficiently Unleash</h3>
	<p class="blue large-text">
	Lorem Ipsum is simply dummy text of the printing and typesetting industry. Lorem Ipsum has been the industry's standard dummy text ever since the 1500s.
	</p>
	<p id="sample">
	<a class="btn btn-default" href="google.com">Search</a>
	</p>
</div>
Those elements have attributes, which are key-value pairs like id=”main”, where the key is id and the value is main. This means the first div element in the example has an ID of “main”.
<div id="main" class="column">
The example above has two elements with IDs: the main div, and the second p element which is sample. We could therefore put main or sample into the Inner Element ID field of our Lead Form Configuration.
<div id="main" class="column">
	<h3>Efficiently Unleash</h3>
	<p class="blue large-text">
	Lorem Ipsum is simply dummy text of the printing
and typesetting industry. Lorem Ipsum has been the
industry's standard dummy text ever since the 1500s.
	</p>
	<p id="sample">
	<a class="column" href="google.com">
			Search
		</a>
	</p>
</div>
Just remember, the script will overwrite the entire contents of the element whose ID you give. Therefore if you don’t want any existing elements overwritten you can just add your own new one, like
<div id="addons_form_location"></div>In fact, because this field is optional, if you don’t fill it in the script does exactly that: it injects a new element with ID artusmode_form_wrapper.
4. Outer Selector
The outer selector is designed to tell the form where to “grow to” once the user has submitted the first form. It is the outer red box in this image:
Due to the limits of web technologies, this must be an ancestor element of the Inner Element. So using the HTML example from the Inner Element ID section we can see that if we used sample as the Inner Element ID, we could target the div as our Outer element, but could not use the first p element since it is a sibling, not an ancestor.
<div id="main" class="column">
	<h3>Efficiently Unleash</h3>
	<p class="blue large-text">
	Lorem Ipsum is simply dummy text of the printing and typesetting industry. Lorem Ipsum has been the industry's standard dummy text ever since the 1500s.
	</p>
	<p id="sample">
	<a class="column" href="google.com">Search</a>
	</p>
</div>
Continuing the HTML lesson from the Inner Element ID section, there is notation you can use to target elements. To target an element by its ID you simply prefix that ID with a hash symbol, like #main. To target all elements who have the class column you simply prefix it with a period, like .button.
There are countless other ways to target elements, for example I could target the a element not just by its class, but by the key-value pair of its href attribute using the notation
a[href=google.com]. Though possible to use complex targeting like this, it should not be needed if your website was well-written using IDs where appropriate.5. CSS
CSS is the “paint” that goes on top of your HTML. It allows you to change many factors of how the page looks, such as which font to use (Arial vs Times New Roman vs Corsiva, etc.), what color to make your background, how much padding between elements on the page, size of the font, even the ability to hide elements.
By default you shouldn’t need custom CSS, but this is the one place you might want custom code, in order to match your brand across the rest of your site. In other words: WARNING: involving custom CSS is a technical business and should only be done by someone with web experience.
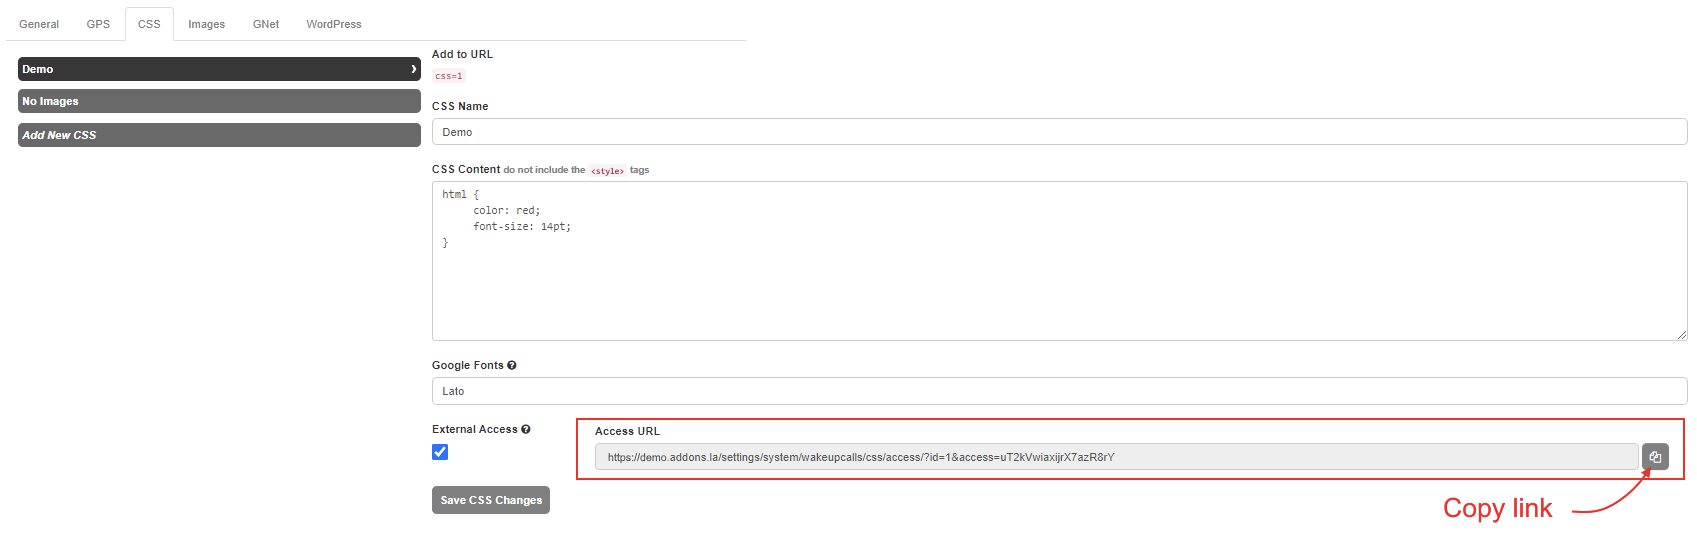
That said, if you wish to proceed with it you can go into your Settings (at the very bottom of the navigation on the left-side of your AddOns.LA account) then click the CSS tab.
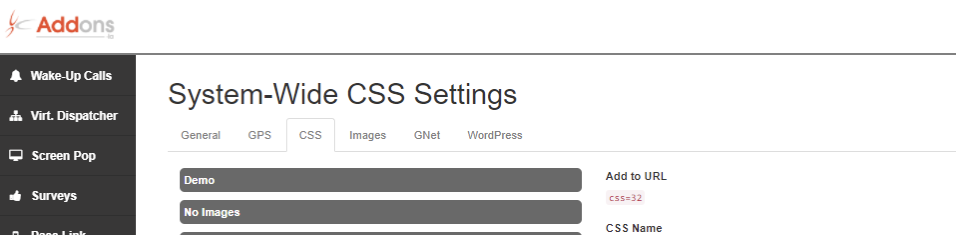
Clicking on the name of any given CSS style will load it into the editing frame. Additionally you can enable External Access for a developer to apply the styling to your Lead Form Configuration without having access to your AddOns.LA account.
To do that simply check the External Access checkbox and save:
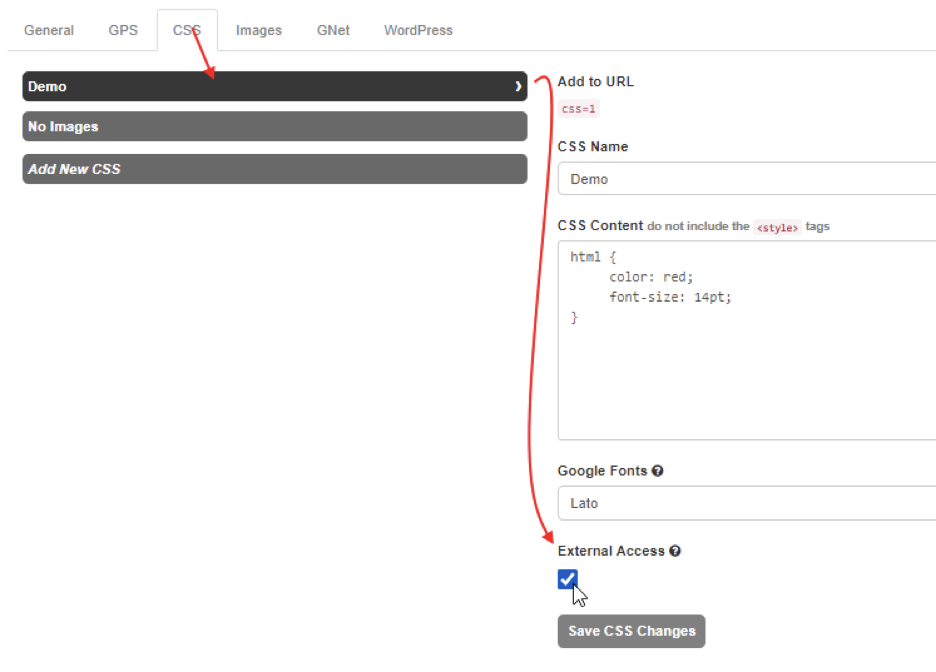
After saving a field will be available, the Access URL which you can copy and give to someone to allow them to edit just that one custom CSS.
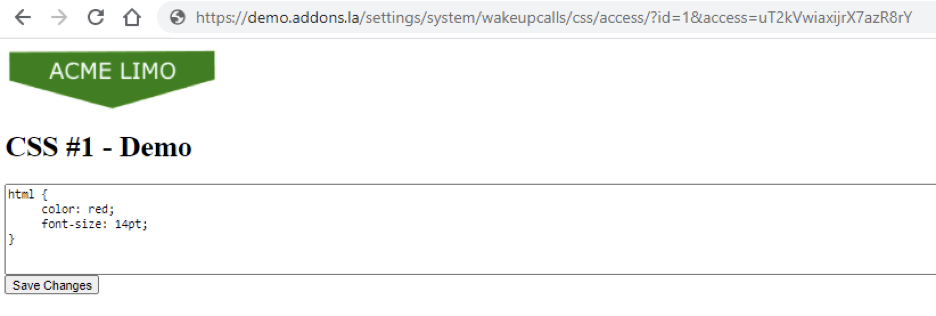
If they go to that page, they will have a simple, single view to edit the CSS:
Without getting into an entire course on CSS options, know that you can move elements around (using either CSS positioning or flexboxes). Anyone skilled in CSS should be well versed in these.
Troubleshooting
Q. My form won’t display on my website.
A: Make sure you have listed your domains in Lead Quote → Settings → System settings → Whitelisted Hosts. Make sure your domain is listed there such as https://yourcompany.com. Note that if you use www to access your site as well, you might also need https://www.yourcompany.com in that list as well!
Q. My form won’t resize on my website.
A: You must be using expander.php via the Embed Code here. If you paste this in as an iFrame yourself it will NOT resize, nor will you get load tracking for UTM codes, Google or Facebook ad tracking, etc.
Q: Form reloads upon submission, always shows the first form!
A: Your Outer selector is not an ancestor of the Inner element. You will need to either move the elements in your HTML around, or target different elements. This is a limitation with HTML itself and cannot be changed.
Q: Form changes from time-to-time without changing settings.
A: Make sure there is only one copy of the Embed Code on the page. To check, right click anywhere on your page and choose “View page source”. Search the page (CTRL+F or Command+F on Mac) for addons.la, and make sure you only have one copy of the form.
Q: My pricing is showing up wrong.
A: This is a configuration issue. Please ensure that your Rate Sheets and or Zone-to-Zone prices are configured correctly. We suggest manually entering a lead (click Lead Quote → Dashboard, then clicking the New Lead button in the top-left corner). Then manually quote that Lead and you will find a question-mark in a circle next to your prices ( ) which you can click for a detailed breakdown of how your price was calculated.
Q: The price coming into LimoAnywhere is missing some of my fields.
A: Please check your rate mapping to LimoAnywhere. Click Lead Quote → Rate Mgmt, then Mapping to LimoAnywhere at the bottom of the list.
Q: The form is showing up, but not submitting.
A: Please confirm the Embed Code is being hosted on your page correctly. (We have seen several times where external developers make the mistake of over-complicating the form implementation and copy the source code of the “expander” script instead of just copying the link to it.) To check that the Embed Code is implemented correctly perform the following steps:
- Right click somewhere on the page the form is hosted on, then click “View Source” or “View Page Source”
- In the new tab that opens up, search (CTRL+F, or Command+F if on a Mac) for addons.la/leads/new/forms/resize/expander.php
- If it is not found, the code was implemented incorrectly. Note: if found but the text is green, with <!– before it and –> after it (does not have to be immediately before/after it!) then the implementation was added to a comment, and is not executing the code.