Establishing and Managing Points of Interest (POIs)
Points of Interest are those destinations that are frequent pick up and drop off addresses for a wide range of the company’s customer base. Commonly these are Stadiums, Theaters, Concert Venues, Hotels, Restaurants, or Bars/ Nightclubs; but there is not a limit as to how many categories can exist in Limo Anywhere. Utilizing POIs is an efficient and accurate way to enter those addresses into the routing portion of the reservation process.
POIs can be added in either the My Office function or Reservation function. This article covers My Office.
Adding A POI
- Click on the ‘My Office’ icon on the toolbar.
- Open the ‘Company Resources’ tab and select the ‘Points Of Interest (POI)’ button as illustrated below.
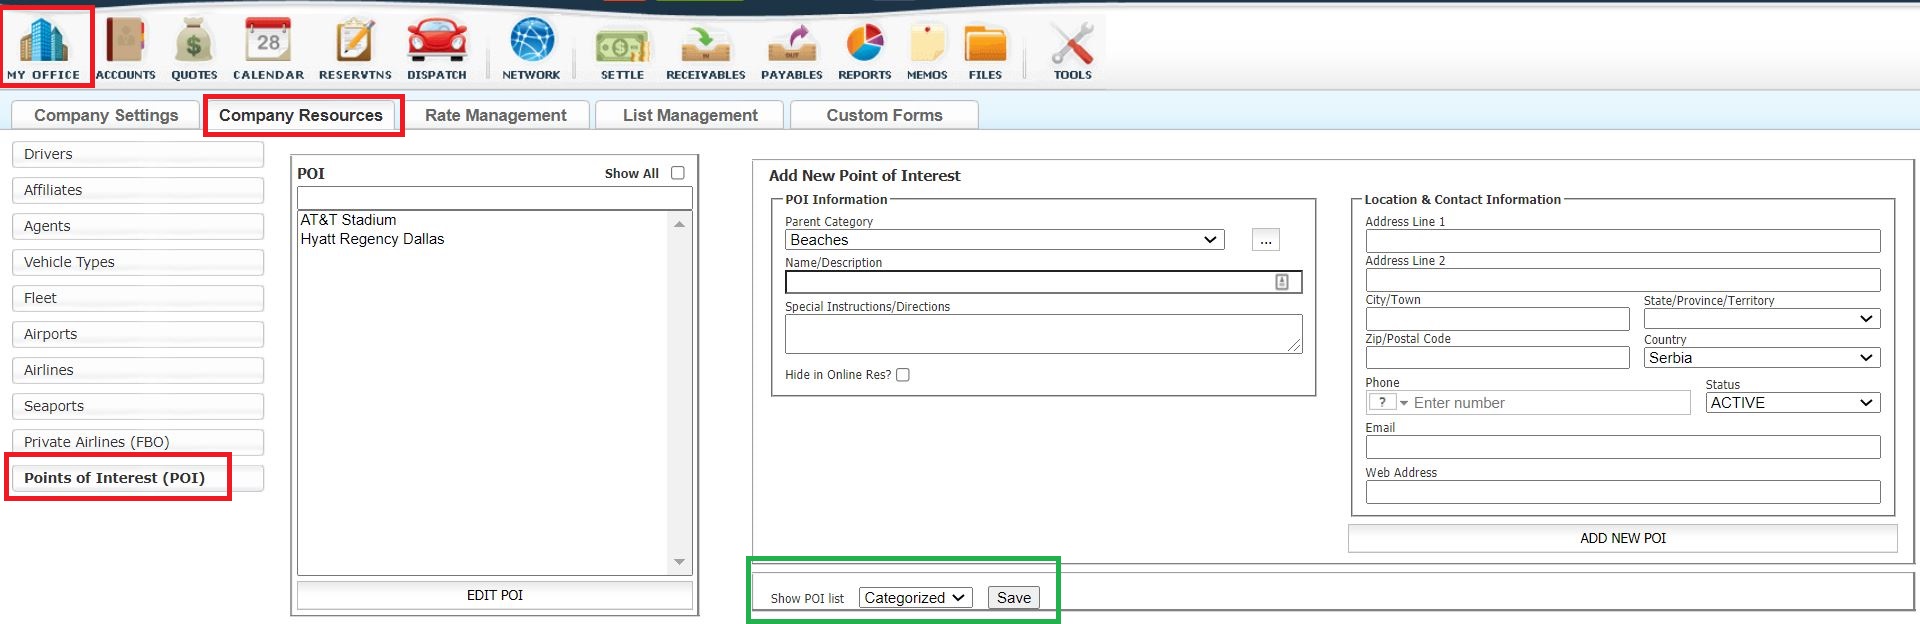

- Before adding a POI there are a settings that should be made that decide how the POIs will be displayed in a reservation.
- In the Show POI list (highlighted above in green) there are two options choose either Categorized (default) or Listed.
Categorized displays the POIs in Parent Categories that fit the company’s needs. Limo Anywhere has default Parent Categories that can be utilized, modified or deleted. POI Categories will display in alphabetical order with individual POIs displaying in alphabetical order within the Parent Category.
Listed displays the POIs in alphabetical order. - Add and Edit the Categories by clicking the ellipsis adjacent to the Parent Category box. Illustrated below are the pop up windows for Adding and Editing a Parent Category(POI Type).
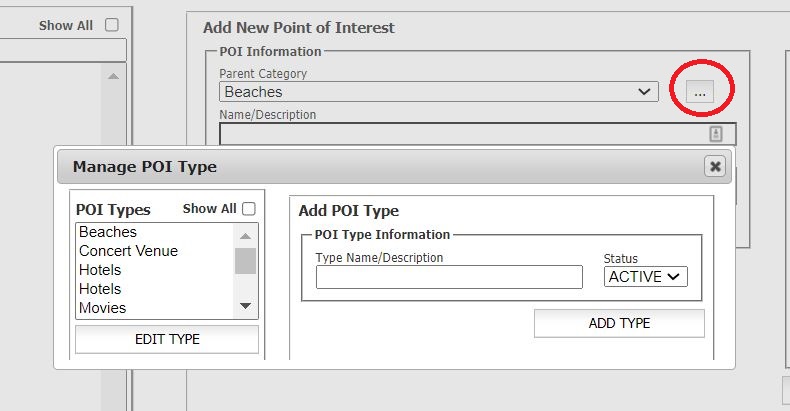
- To Add enter the name of the POI Type Name/Description; set the Status to Active/Inactive, and click the ‘ADD TYPE’ button to add the Category.
- To Edit a POI Type select the POI Type from the POI Type list and click the ‘EDIT TYPE’ button. Make any changes to the POI Type Name/Description, Status as needed, and click ‘UPDATE TYPE’ to save changes.
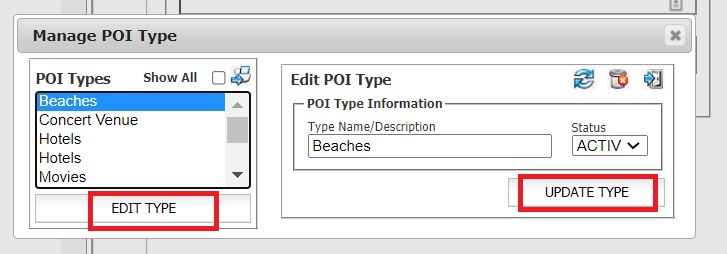
Note: POI Types can be deleted by going to the Edit POI Type function and clicking the Delete icon , and clicking ‘OK’ in the delete confirmation pop up. It is advised however to use the Status function and make a POI Type INACTIVE rather than deleting it.

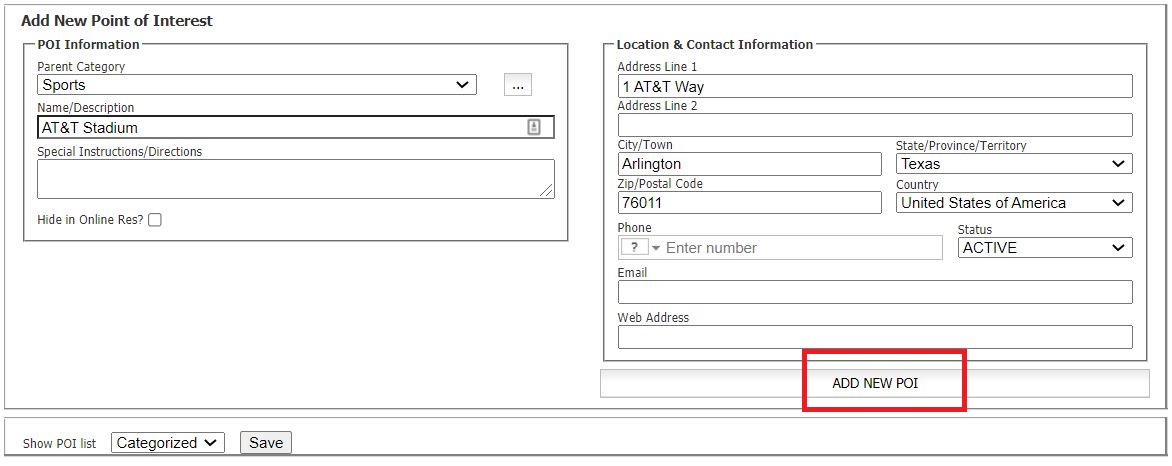
To Add a POI enter the information as illustrated below.
- Select the Parent Category from the drop down list (in the example below ‘Sports’ is selected).
- Enter the Name/Description (in the example below ‘AT&T Stadium’).
- Enter any Special Instructions/Directions.
- Click the check box the ‘Hide in Online Res?’ if this POI is to be blocked form online booking.
- Enter the Primary Address, City, State, Zip/Post and and Phone.
NOTE: The information in these fields will populate into the reservation if the POI is selected as a pick up, drop off, or stop in a routing. - Select the Status as either ‘ACTIVE’ (default) or ‘INACTIVE’.
- Enter the Email Address and Website (optional).
- Click ‘ADD NEW POI’ to retain the information entered

Editing A POI
- Select the POI that is to be edited from the POI list as illustrated below.
- Click ‘EDIT POI’.
- Enter any new data in the appropriate fields.
- Click ‘UPDATE POI’ to retain any changes.


Deleting a POI
WARNING: Deleting a POI can have far reaching effects in the database if that POI is utilized in any reservations past or future. For that reason it is strongly recommended that POIs not be deleted. Instead it is best to utilize the Status, and change the Status of a POI that is not being used to INACTIVE.
- Select the POI that is to be deleted from the POI list.
- Click ‘EDIT POI’.
- Click the ‘Delete’ Icon in the upper right of the Edit POI box.
- The Deletion Confirmation Message will appear. Click ‘Cancel’ to not delete the POI (STRONGLY RECOMMENDED); or ‘OK’ to delete the POI.
POIs in Reservations
POIs established in the company’s Limo Anywhere can be selected in the Reservation process to gain efficiency and accuracy in entering the necessary information.
In an existing or new reservation:
- Select the POI icon at the top of the routing box.
- Select the POI from the Stored POI drop down list. POI’s that are ‘ACTIVE’ will appear on the the Stored Points of Interest drop down list in alphabetical order and grouped by POI Category.
- When a POI is selected as illustrated below Limo Anywhere populates the fields:
Location Description/Name
Address, City, State, Zip/Postal Code and Phone Number
Notes (the text entered for the POI Special Instructions if entered in the selected POI are displayed) - Click on one of the routing point labels (Pick-up, Drop-Off, Stop, Wait) to save the entry as a routing point.
